When you order a breast pump, you almost always receive a manufacturer’s warranty, along with access to helpful support services that can resolve issues quickly and keep your pumping routine on track. The warranty information on breast pumps isn’t always intuitive to understand, however. Here’s a rundown of some of the more common concepts and what kind of support you can expect.
How to Understand Warranty Information & Services With Breast Pumps
General Information
Most breast pumps come with a warranty that protects you against manufacturing defects in the main components. The manufacturer will typically repair or replace the pump at no cost to you if the motor, wiring, or other essential parts fail, but only if they fail because of a factory issue. They won’t replace these things if they are damaged in everyday use or in an accident.
How long your pump is covered depends on the brand. The Unimom Opera includes a full three-year warranty on the pump itself, while Spectra models usually carry a two-year warranty on the motor with a shorter three-month warranty for accessories. Pumpables typically offers two years on the motor and ninety days on parts and cups. These terms will appear in the product descriptions when you buy and in more detail in the manual that ships with your pump.
Things That Aren’t Covered
Certain parts and certain situations aren’t covered under most standard warranties. Manufacturers typically classify flanges, valves, membranes, tubing, and collection bottles as consumable items, which means they’re expected to wear out naturally with regular use and cleaning. Since this is expected, it’s not covered: your coverage is only for defects. This means, for example, that if a valve splits or a membrane becomes stretched after weeks of daily pumping, you are expected to replace it yourself.
Accidental damage also falls outside the warranty. Dropping the pump, getting it excessively wet beyond what would be normal for cleaning, or using any non-approved accessories can all void the warranty entirely. The warranty is also voided if you use the pump in a way that’s not recommended, such as by running it without all parts assembled or with incompatible tubing. The best defense against having your warranty voided is reading the warranty section in your manual carefully so you understand all limits upfront.
Where You’ll Find the Terms
When your package arrives, open the box and look inside for the user manual or any separate warranty card. These documents will spell out the coverage period, what qualifies for coverage, what isn’t covered, and the steps you’ll have to go through if you need to file a claim. If you misplace your receipt, contact us at Breastpumps.com directly. Our team keeps records of every order and can email you a copy of your proof of purchase, which most manufacturers will require before they process anything.
You can also visit the manufacturer’s website and enter your pump’s model number or serial number to pull up the details of the warranty online. Saving the original box for the first several months is often wise because some brands ask for the serial number that’s printed on it.
Troubleshooting Issues With Your Pump
When your pump stops working correctly, think through and then take the following series of actions. These will help you identify the cause without putting any unnecessary stress on you, and if you have to call support, you’ll be able to walk them quickly through what you’ve already done.
Start by confirming that the power source is functioning properly and that the pump is fully charged (if it has a battery). If that’s all good, then inspect and replace any soft parts that are showing signs of wear, such as sticky valves or torn membranes. Sometimes this simple step restores normal suction immediately. If the problem continues, test some things by switching parts between the sides to see whether the issue follows a specific component.
Once you’ve done these steps, reach out to the manufacturer’s customer service line listed in your manual. Their representatives will usually then walk you through a few additional checks to check for some common issues they know of with their specific model, and often they can help you fix the issue or properly diagnose the trouble. If they confirm it sounds like there’s a warrantied defect, they’ll arrange for a repair or replacement.
At Breastpumps.com
We don’t issue the warranties, but our team plays a valuable supporting role for you. You can call them at 1-888-495-7491, use live chat on the website, or email referrals@breastpumps.com for help with your order. We can send you copies of receipts and direct you to the correct manufacturer contact. We can also answer questions about whether your insurance might help with replacement parts.
Also, many moms have original insurance benefits that include one or two sets of replacement parts during the first year. We can usually help you in accessing this coverage. You simply provide your insurance details, and we’ll check eligibility and handle much of the paperwork.
Avoiding Issues With Your Pump
Here’s a few simple, daily habits that’ll keep your pump running smoothly and protect your warranty:
Replace duckbill valves and membranes every one to three months or as soon as they start to feel sticky or lose their seal
Clean only the parts the manufacturer recommends for washing: never submerge electrical components
Store the pump in a dry, dust-free place when you finish each session
Always use genuine manufacturer-approved accessories (third-party substitutes can damage the motor and void coverage)
Filing Your Claim
If you do have issues and need to make a claim against your warranty, there’s a pretty predictable path you can follow. First, contact the manufacturer and describe the symptoms in detail, as covered above. Most will require that you go through this step before they’ll actually want you to return a pump. If that doesn’t fix it, they’ll typically ask you to provide the model number, serial number, and date of purchase. If they approve the claim, they’ll then supply you with specific return instructions and a shipping label, in most cases, though in some cases they may simply send you a replacement pump.
Whether you’re getting the pump fixed or replaced, you’ll eventually send the defective pump back, and they’ll ship the replacement or fixed pump back to you at no charge. The entire process rarely takes more than a week or two, though a lot depends on how fast the shipping happens. You can also always visit Breastpumps.com and talk to us about the process if you have questions or concerns.
Taking time to learn your pump’s warranty coverage and the support that’s available from the manufacturer (and available through us at Breastpumps.com!) takes away a lot of the uncertainty that can arise when equipment acts up. We know that new moms have enough on their plate, and we’re ready to help you move forward with as little stress and as few delays as possible. Reach out to us at Breastpumps.com any time you have a question. Our goal is to make the process of getting a pump and keeping it in good shape as simple as possible for Mom.
As a new mom, you’ve got a ton of decisions on your plate, and when it comes to breast pumps, there are many options. If you’re trying to decide between a portable vs table-top model, though, we can help you evaluate the general pros and cons and learn how to compare the two to see which is best for your lifestyle and needs.
Portable vs Table-Top Breast Pumps
Defining Our Terms
Portable breast pumps are usually of lightweight construction (often weighing less than a pound) and have rechargeable batteries so you can have easy, cordless operation. Many models fit discreetly inside a bra so you can do hands-free pumping as needed even while commuting or doing household chores.
With these models, flanges are typically compact, and milk collection cups are smaller and designed to slip easily into and under clothing. Some advanced versions will connect to smartphone apps for tracking your sessions, adjusting suction levels, and monitoring battery life. They typically also come with an array of travel-friendly accessories, such as carrying cases that meet airport security standards. Finally, most prioritize quiet in the motors so you can have a bit more privacy in a public setting.
Table-top breast pumps, which might also be called “stationary,” are about having a strong, efficient pump. These units plug directly into electrical outlets, so they deliver consistent power. You’ll often see models with dual expression capabilities so you can pump from both breasts to save time, and they come with larger collection bottles and typically a lot more choices for flanges and settings. Many modern versions will include digital displays so you can control speed, suction, and memory functions.
General Pros and Cons
Portability is in itself obviously the biggest benefit of a portable model, but it has to come with some trade-offs. Battery life on the portable models will typically last for several sessions, but they do require regular charging, and if you forget, you’re out of luck. Also, the battery power means suction strength is limited. So while these are effective for many, they might not work for all and can’t match the intensity you get in larger, table-top models.
The stationary nature of a table-top model isn’t ideal if you don’t have a pretty predictable routine, but the efficiency and reliability are unmatched. If you need to do a prolonged session, you get uninterrupted power for as long as you need. Drawbacks, however, will include the weight and bulk of these models and the requirement to be near a power outlet to use one.
Making Your Choice
Mobility Needs and Daily Activities
Mothers with active lifestyles, such as those who commute by public transport or frequently have to run errands, will benefit immensely from portable options. These pumps allow for multitasking and make it possible to express milk while you’re preparing meals or attending virtual meetings. Table-top models, however, excel in environments where time isn’t an issue. A stay-at-home parent might prefer the stability of having a designated pumping station in a nursery with no need to worry about the hassle of recharging a device.
For women balancing work or school with motherhood or for busy athletes or outdoor enthusiasts, the portability of smaller models allows you to do discreet pumping sessions in break rooms, whereas table-top units require planning, outlets, and more privacy. Those with newborns who spend most of their time at home are more likely to appreciate that table-top models tend to come with more flange choices and can generally pump more efficiently.
Power Sources and Reliability
Portable pumps rely on built-in batteries, and while this offers you freedom from cords, you have to be vigilant in your charging habits. A full charge might get you as many as six to eight sessions, depending on the model, and some do have USB compatibility with power banks in case you forget or don’t have time for a full recharge.
Table-top pumps draw power from wall outlets, so that does ensure steady suction without interruption from any low battery warnings. It also means you’re tied to a certain place. However, the reliability of a plug-in model might be just what you need for a groggy nighttime pumping session or if you find your milk supply needs stronger stimulation. Some of these models do come with adaptors that allow you to use them in the car, making them slightly more versatile, but they’re still not truly portable.
Size and Weight
Size and weight directly impact how well a pump is going to fit into your daily life. Portable models obviously are more compact and easy to slip into bags without adding a lot of bulk. They’re also great if you’re trying to deal with an infant and toddler at the same time and don’t want any more weight to carry than you absolutely need.
Table-top pumps are, of course, larger by design. This means they will typically require a dedicated storage space and are cumbersome for travel. They can be a real challenge if you have limited luggage space, too. However, bear in mind that their size and weight are often due to their having more robust components and larger motors, so you get stronger suction and more efficient pumping.
Noise Levels and Discretion
Noise is often a key concern for a pumping mother, and typically portable pumps are made with a focus on quiet operation. Motors are engineered specifically to produce as little sound as possible, which makes them great for pumping in any place where you don’t want to draw attention.
Table-top models vary in volume, and some definitely have a rhythmic hum that’s loud enough it might disturb light sleepers or your work colleagues. While advancements in tech over the years have reduced the noise levels in newer versions, they are generally still pretty loud compared to portables. Discretion isn’t just about noise, though. It’s also about design. Portables can be concealed under clothing, but if you’re using a table-top model you’ll likely want either a privacy cover or to use it in a secluded area.
Pumping Efficiency and Milk Output
So far, the portables have been shining in our comparison, but when we talk about efficiency and milk output, the table-top models really come into their own. Portable pumps offer respectable suction and typically come these days with multiple modes to mimic the letdown and expression phases. However, their smaller motors often mean you actually need longer sessions to completely empty.
Table-top models give you rapid, thorough extraction, so you’re minimizing the time you spend pumping. Their dual-phase technology closely replicates the feel of natural nursing, and most women find this promotes better let-down reflexes and higher yields. If you’re only pumping, the efficiency will likely be invaluable to you in maintaining an ample supply.
Cost and Long-Term Value
Portable pumps usually come at higher prices due to their more advanced technology. Essentially, look to find them in the mid- to premium tier of pumps. There are usually more table-top models available at affordable entry points, and the accessories for table-top models are usually also a bit more budget-friendly.
Which model is right for your lifestyle? To look through options, contact us now at Breastpumps.com. We can help you find a model that fits your lifestyle and is covered by your insurance.
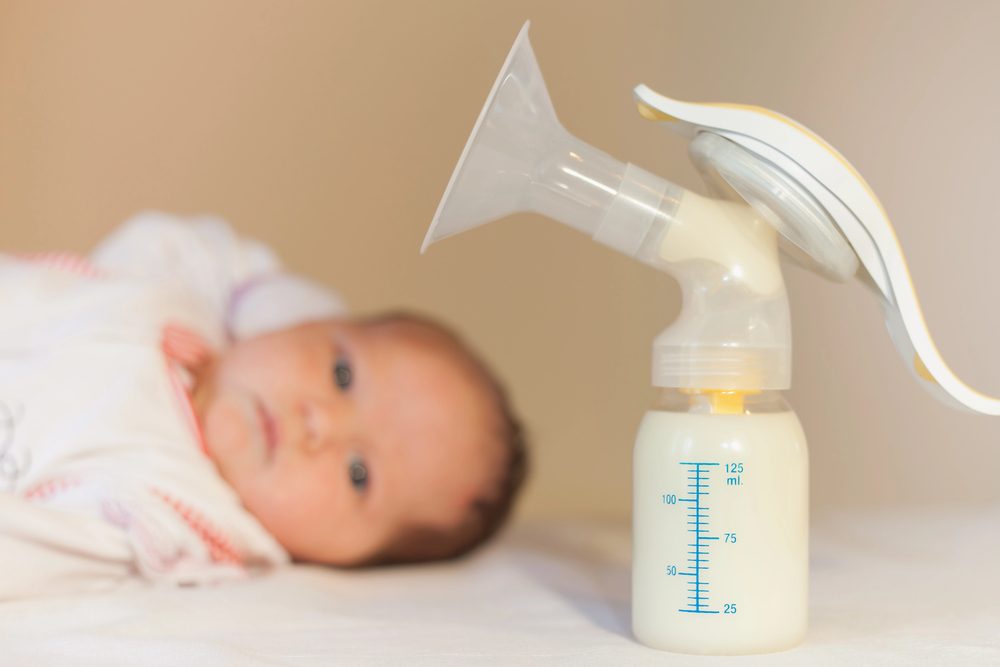
Welcoming a new baby means countless moments of joy, but it also introduces a learning curve that no one fully anticipates until they are in the thick of it. For nursing mothers who pump, breast pump care can be tricky, and keeping breast pump parts clean and truly sanitized is one of the most important of your new daily responsibilities. Milk residue that gets left too long on the parts will become the perfect breeding ground for bacteria, mold, and a biofilm that no amount of casual cleaning can sufficiently remove. The good news is that safe, thorough cleaning and sanitizing require only a few minutes once you understand the right steps and the reasons behind them.
Breast Pump Care: Cleaning and Sanitizing Safely
Why Cleaning and Sanitizing Are Two Separate Steps
Many mothers use the terms “cleaning” and “sanitizing” interchangeably, but these are actually two functions that accomplish two different goals. Cleaning removes the visible milk fats, proteins, and other residue from the surfaces of flanges, valves, membranes, bottles, and tubing. Warm water and a mild dish soap designed for baby items can handle this task beautifully.
Sanitizing, however, takes the process further by killing the microscopic organisms that cleaning alone leaves behind and which aren’t visible to the naked eye. The Centers for Disease Control and Prevention recommends both steps for any item that touches breast milk in any way, and especially if your baby is still under three months, was born prematurely, or has a compromised immune system. But the reality is that even healthy, full-term infants can still benefit from this extra precaution because their digestive and immune systems will continue developing well into the first year.
Gather the Right Tools
To thoroughly clean and sanitize your breast pump parts properly, here’s some of what you’ll need:
A dedicated washbasin that you use only for pump parts and baby bottles (remember that using the kitchen sink could introduce cross-contamination).
A fragrance-free, dye-free dish soap labeled safe for infants; many popular brands offer versions specifically for breast pump parts and bottles.
A small bottle brush with soft bristles that can get inside narrow tubing connectors.
A separate nipple-and-valve brush.
Soft microfiber cloths or paper towels reserved solely for drying pump parts (this prevents cross-contamination by lint and stray germs from using ordinary kitchen towels).
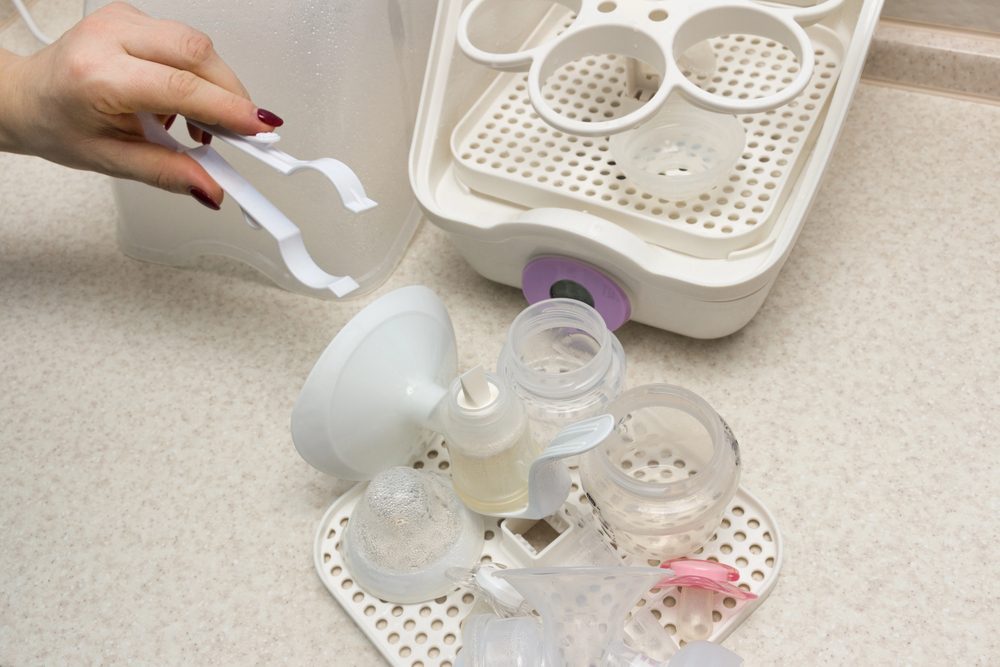
Cleaning After Every Pumping Session
The moment you finish pumping, take thirty seconds to rinse each part under cool running water. Using cool water prevents milk proteins from “cooking” onto the plastic the way hot water sometimes does. Next, disassemble everything completely. Remove the membranes from the valves, separate the backflow protectors, and detach all tubing from both the pump and the flanges.
Fill your dedicated basin with hot, soapy water and submerge all the components. Scrub them gently but thoroughly with the bottle brushes, paying special attention to the underside of valves and the inside of duckbill or membrane covers. Finally, rinse everything again, this time under warm running water, until no soap residue remains, and then place the pieces on a clean towel or a drying rack designed specifically for baby items. If you have the time, air drying beats towel drying because even freshly laundered towels can harbor bacteria.
When and How Often to Sanitize
Sanitizing daily is really the gold standard if you have a newborn or a medically fragile infant, but once your baby reaches three months and is in good health, you can do it less often so long as you clean thoroughly after each use. Many experienced mothers end up sanitizing in the evening after the final pump of the day, so they can store their replacements parts in the morning.
There are four reliable methods for achieving true sanitation: boiling, steaming, using steam sanitizers designed for countertops, or using your dishwasher. Each works well when you follow the instructions precisely.
The Boiling Method
Bring a large pot of water to a rolling boil. Carefully lower the disassembled pieces into the water using tongs, and set a timer for one full minute from the moment the water returns to a boil. When the timer goes off, turn off the heat and let the parts remain in the hot water for another minute or two before removing them with clean tongs. Place them on a fresh, clean towel to air dry.
Microwave Steam Bags
Steam bags are very convenient and also effective. Fill the bag with the recommended amount of water, which is usually two ounces or so, and then add the clean, disassembled parts. Seal the bag securely and then microwave it according to the package directions. This will usually take from three to eight minutes, depending on the wattage of your microwave.
Allow the bag to stand for the suggested cooling time before you open it, and then empty the parts onto a clean drying rack and let them air dry. Each reusable bag can go for twenty or more cycles, so this is an economical and portable way to sanitize, especially if you have to pump at work. Just be sure to allow bags to completely air dry between uses.
Electric Steam Sanitizers
Countertop electric steamers that are specifically designed for bottles and pump parts are now available, and they’ve definitely gotten more popular with moms over the last few years. All you have to do is load the clean parts onto the racks exactly as the manufacturer specifies, add the correct amount of water to the base, and press the button. Most units finish in six to twelve minutes and keep the items sterile until you open the lid.
The Dishwasher
The CDC recommends using your dishwasher to clean and sanitize at the same time. This works only if you use the hot water wash and heated dry settings (or sanitizing setting). Using the dishwasher seems so simple you might wonder why anyone would use anything else, but the breast pump parts can take up a lot of space, and running both a hot water wash and a heated dry cycle can take more time.
If you have other kids and lots of dishes that need to be done, the dishwasher may not be the most feasible application, and an electric steam sanitizer or a microwave bag could be much more efficient.
Special Considerations for Tubing
Liquid inside the tubes can promote mold growth that will spread to every bottle of milk you pump, so the tubing has to be dealt with carefully. If you notice no milk or condensation inside the tubing after a session, then simply hang it to air dry, but when milk does enter the tubing or you notice any condensation, wash it immediately.
Run warm, soapy water through each tube, then rinse them thoroughly with clean water. Hold one end up high and let gravity drain the tube completely or use a pipe cleaner made for pump tubing. Then, run 70% isopropyl alcohol through the tubing to sanitize it before thoroughly rinsing it with water and hanging to dry. Tubing doesn’t do well being boiled, steamed, or put in the dishwasher, so the alcohol is the fastest, safest way to ensure sterility.
Breastfeeding journeys are as individual as the mothers who live them. One woman will have a seamless latch right away and overflowing supply, while another battles discomfort that makes every pumping session feel like an ordeal. Add a swirl of hormones to all that you’re dealing with, and things can get…complicated. One of the last things you may feel like doing is fighting with the flange sizing on your breast pumps, but it’s a crucial part of the journey. If you choose the wrong size, it might cause pain or prevent you from yielding the supply you need. With the proper size, you’ll feel encouraged, and your pumping experience will be more comfortable and productive.
The Importance of Correct Flange Sizing
Flanges might not seem important, but they make a big difference to your pumping outcome. The flange needs to embrace your nipple closely without squeezing the areola or allowing too much empty room. When it succeeds in this, the suction distributes uniformly and properly rouses your milk ducts. You’ll also typically get more thorough drainage in less time with minimal nipple injury, which lowers your chances of developing mastitis or fissures.
A poor fit triggers a chain of issues. If the flange runs small, it pinches your tissues and causes pain. If it runs large, the nipple can scrape the tunnel interior and invite irritation, swelling, and ineffective suction. Eventually all these difficulties can lead to you production falling short. You may even stop nursing sooner than intended. After all, discomfort is a primary cause of premature breastfeeding termination.
At BreastPumps.com, we offer flanges in a wide variety of sizes because uniformity serves no one.
How Nipple Structure Shapes Your Flange Requirements
Each breast stands apart, unique in its size and shape based on your heredity, hormones, and life phase. Nipple width can actually differ broadly. Some might register eighteen millimeters before suction, while others reach twenty-four millimeters or beyond, and elasticity factors in as well. Under suction, your nipple swells a bit and should occupy eighty to ninety percent of the tunnel without brushing the walls. The areola, the colored zone encircling the nipple, needs to stay largely beyond the flange.
Elements like early-week fullness or body weight changes can also cause a change in fit as the months pass. Prolactin floods after birth frequently cause a brief enlargement that calls for a bigger size at the start, and once your supply steadies, you may need something smaller. Stretchy nipples will tend to elongate more beneath the pull and require a flange that permits motion without allowing for abrasion. Stiffer nipples will need very exact proportions to stop tugging.
Gauging Your Nipple to Find the Best Flange Size for Your Breast Pumps
To get the most accurate measurements, wait until your breasts are not excessively swollen. It’s often best to gauge around mid-morning following nursing or pumping, when the tissue is supple. Find a ruler marked in millimeters or download a guide, and then start by hand-expressing a drop or two of milk or using your pump to mimic suction states. Position yourself before a mirror for the most accurate readings.
Set the ruler at the base of your nipple where it meets the areola. Measure the width of just the nipple itself from edge to edge—don’t count any areola tissue that sticks out. Mark down results for each breast, since differences are likely, and then base your choice on the larger nipple. Be sure to increase your figure by one to two millimeters to allow for swelling.
If you’re caught between options, lean larger so you don’t have issues with constriction. You can evaluate the fit during your next full pumping cycle. During this evaluation, your nipple must sit centered in the tunnel and glide smoothly with each pulse. Only a little areola should enter the tunnel. Once you’ve selected your size, check again every few weeks, particularly if your yield slips or soreness appears.
Signs of Improper Flange Fit
Your body will send clear signals about flange mismatches if you pay attention, and pain is the most important warning. If you feel sharp pain while you’re pumping or a dull ache and tenderness later that won’t go away, you probably have the wrong size flange. Visual clues to look for include seeing red circles on your areola, puffy nipples, or milk that’s stuck in the tunnel because you’ve only partially voided.
Another sign there’s an issue is if your productivity suffers. If you notice that your pumping sessions aren’t returning the same amount even though you’re getting good letdown, or if they last beyond 15 or 20 minutes for both sides, then there’s a good chance you’ve got a sizing error. Sound can also be an indicator. If air is escaping, you might hear a whistling sound. You might also get an erratic pull. And obviously, if you’re seeing any blood, even if it’s just a little, adjust your flange size to avoid further injury. If you’re still having trouble, connect with one of our lactation specialists at Breastpumps.com for expert guidance.
Adapting Flange Size Across Nursing Phases
One of the things new moms might not be aware of is that your demands, especially your flange size, are likely to evolve across nursing phases. During your initial pumping sessions, you may need a really gentle option, but when your volume starts to peak, you may need to enlarge your flange size so that you can keep pumping without pain.
There are sleek flanges available that you can use once you go back to work so you can pump more subtly. Be aware, too, that if you’re pumping right after you’ve been briskly active or are very warm, your breast may have swelled slightly. Monthly hormone changes can also make a difference, but if you keep a log, you’ll be able to anticipate these. Always carry extras in different sizes and keep them in your tote bag so you have options.
Knowing When to Consult Specialists
There’s no shame in getting help, so if you’re having trouble after a couple of tries, it’s time to talk to a lactation specialist. Additionally, nipples that are overly stretchy or particularly stiff and narrow may need some tweaks beyond just a different flange size. A professional can help you make this assessment, as well as rule out if anything could be wrong with the pump or suction force.
Contact us today at Breastpumps.com to see which insurance-covered breastpumps you qualify for, and get the support you need to take charge of your breastfeeding story.
Motherhood has a way of changing things overnight. Before the baby, you’re just mapping out a leisurely coffee run. After the baby, you’re juggling a breast pump, a cooler of milk, and a diaper bag that feels like it’s holding the weight of the world. If you’ve ever found yourself in the back seat, fumbling through a tangle of pump parts while your little one dozes in the car seat, you’re not alone. Breastfeeding on the go is tough, and at the heart of mastering it are the right travel bags. These breast pump accessories are your holy grail of mobile pumping.
Why Travel Bags and Totes Are a Game-Changer for Breastfeeding Moms
Life doesn’t pause for milk production. The American Academy of Pediatrics recommends exclusive breastfeeding for the first six months, and many moms extend that well into toddlerhood, but when you’ve also got to return to work, travel for family visits, or even just hit the playground, you need to be able to pump to keep your supply up. Without the right setup, the logistics are overwhelming.
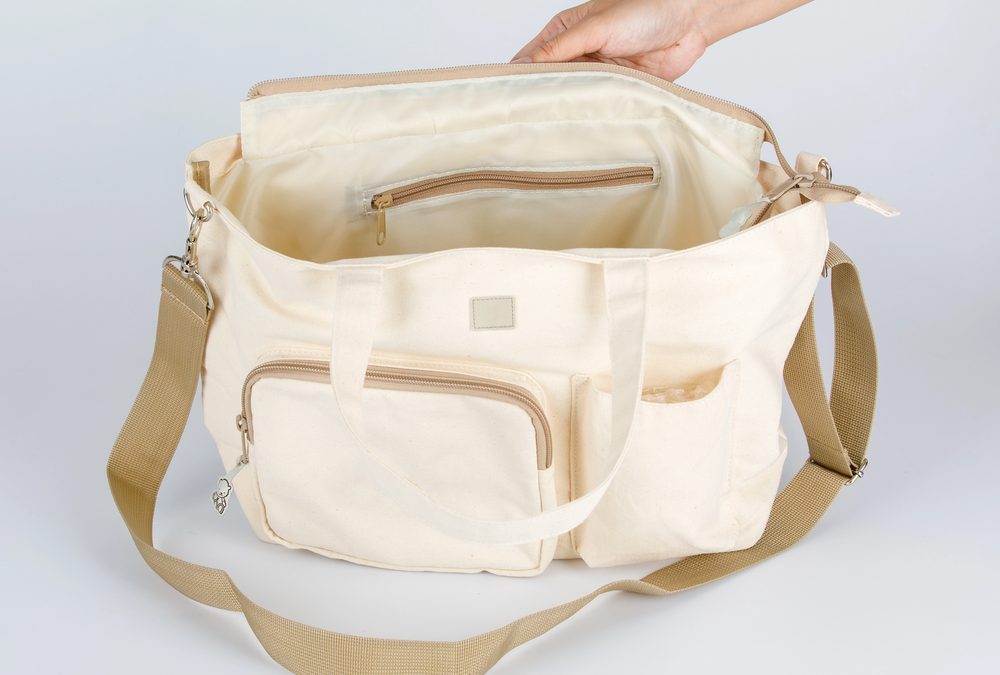
Pumping bags and totes are the breast pump accessories you need. They’re insulated, compartmentalized, and tough enough to handle spills, bumps, and the occasional toddler tantrum. A good one can hold your breast pump, flanges in multiple sizes, storage bottles, a portable cooler, cleaning supplies, and even a nursing cover. This efficiency comes from a smart design that includes quick-access pockets for tubing and Velcro straps to keep your pump steady during those bumpy commutes.
At BreastPumps.com, we stock a range of options because we know that choosing one of these isn’t about fashion (though, let’s be real, who doesn’t want to feel put-together?). It’s more about finding a bag that will actually support your breastfeeding journey. Invest in quality, and you’ll save hours of frustration, and even money from protecting your parts from damage.
Step 1: Selecting the Perfect Pumping Bag or Tote for Your Lifestyle
Not all pumping bags are created equal. Start by assessing your routine. Are you a desk-bound professional who needs something that slips under your office chair? Or are you a frequent flyer who needs TSA-friendly dimensions? Once you’ve thought through where and when you’ll be using it most, consider the following:
Capacity and Compartments
Your pumping bag needs to be able to multitask without all your stuff being jumbled up. Look for at least three main compartments. You’ll need one insulated for milk storage (to keep it fresh for up to 12 hours), a padded section for your breast pump, and exterior pockets for quick-grab items, like wet bags or sanitizing wipes. Measure your breast pump first, because a wearable one like the Willow Go will fit in slimmer totes, but larger models like the Unimom Opera demand more space.
Portability and Comfort
On the go should also mean hands-free when possible. Backpack-style totes are great because they distribute weight evenly and will spare your shoulders during long walks. Adjustable straps and chest clips are must-haves for moms carrying a baby carrier, too. For car commutes or airports, you might prefer totes with luggage handles that can slide over suitcase grips.
Budget and Eco-Friendly Picks
Quality doesn’t have to break the bank, and there are some entry-level totes that start at $20. But investing more like $50–$100 in a feature-packed one could pay off and save you your sanity. For eco-conscious moms, look for reusable ice pack options and BPA-free accessories.
Ultimately, though, remember that the best bag is the one you’ll actually use daily.
Step 2: Packing Your Travel Bags With Breast Pump Accessories and More
Packing is an art form that saves time and stress. When your tote is packed well, every item has a place and nothing rattles around like loose change in a dryer. Aim to prep everything the night before so mornings can be just grab-and-go.
What to Pack Every Time
Follow this checklist to avoid forgetting a crucial piece behind, especially for extended travel:
Breast Pump and Power Source: Your double electric pump, plus a car adapter or portable battery. Put it in the main compartment and secure it with elastic loops.
Pump Parts and Flanges: Bring extra flanges, membranes, valves, and tubing. Use a dedicated accessory pouch so you don’t end up with any cross-contamination.
Milk Storage: Pack at least four to six bottles or bags. Pair it with a six to eight-hour cooler insert and frozen ice packs. Pre-label bags with the dates you intend to pump using a Sharpie.
Cleaning Kit: Microwave sterilizer bags, brush sets, and unscented wipes are great. A small bottle of baby-safe soap is smart, too.
On-the-Go Extras: Nursing pads, a hands-free bra, nipple balm, and a snack bar are always useful to have on hand!
Aim for under 10 pounds to keep it tote-able, and use packing cubes or divided inserts to create “zones.” Zones might include clean parts, dirty, milk, cleaning supplies, etc.
Organization Hacks
Try color-coding the compartments. A good way to go can be blue for clean, red for used, green for milk, and purple for supplies.
Roll the flanges and tubing to save some space, and put them in a small Ziploc bag to keep them free from debris.
Download apps like Pump Log so you can track your sessions easily and sync with smart pumps. That’s one less thing you have to keep track of in your mind.
For longer outings, scale up by adding a foldable pumping cape for privacy and a power bank for all-day juice.
Step 4: Troubleshooting Tote Troubles and Pro Tips
Even the best setups can hit snags, and your setup isn’t efficient if it falls apart once you get into the real world. Here’s a few pro tips:
Is milk leaking into other pockets? Then try doubling up your storage bags or add a small dry-bag insert.
Do you feel like your bag is always overpacked and too heavy? Conduct a weekly audit. Throw away any expired products or old wrappers, and consolidate any duplicate things you’ve been carrying around that you don’t need for everyday use.
Bonus: Follow our BreastPumps.com social media accounts for mom hacks from us and other moms like you who are pumping on the go!
Pump On, Mom
Don’t worry. You don’t have to get it all perfect the first time. The important thing is to stay persistent, invest the time to discover the right tools, and then play around with them to make them work into your schedule and needs. When you have a well-packed tote, it helps turn chaos into confidence. There is no better peace of mind than knowing you’re able to nourish your baby no matter what the day brings you.
If you’re shopping for the right breast pump for your budget and lifestyle and are overwhelmed by all the options, you’re not alone. Whether you’re a first-time mom or a seasoned mom who needs a replacement pump, there are plenty of double electric breast pumps on the market that you can choose from. Before you buy, knowing what features to look will help you make the best choice for your lifestyle, budget, and needs.
What Features to Look for When Shopping for Double Electric Breast Pumps
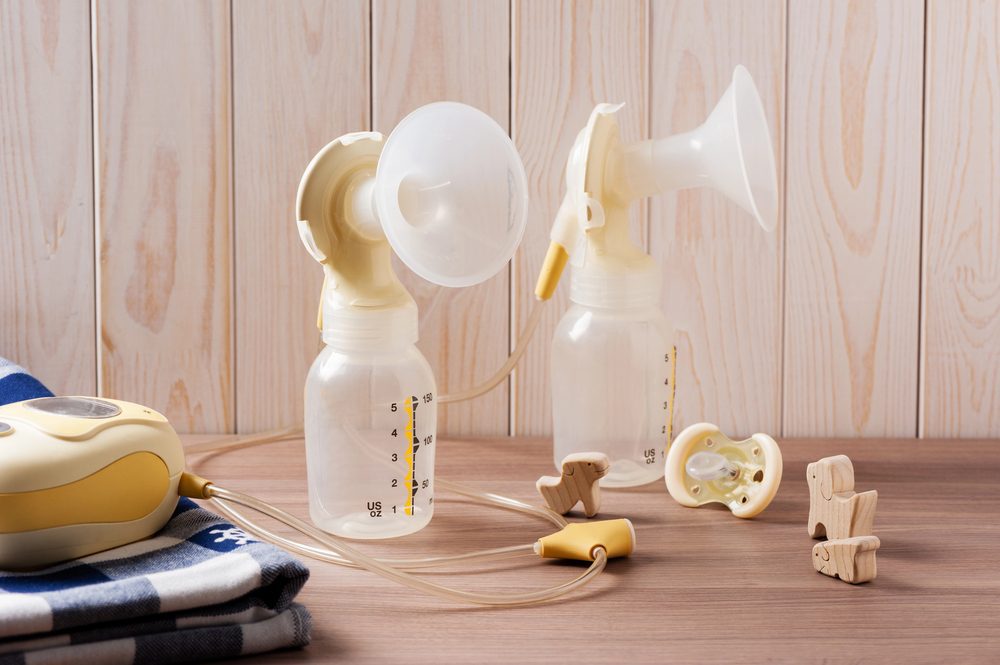
A Portable Pump
If you plan on pumping outside the home, whether at work or anywhere else on-the-go, portability will be an important feature to look for. Portable breast pumps either come with a rechargeable battery or are battery-operated.
These double electric breast pumps are easy to transport and don’t require a power cord to operate. If you’re looking for a breast pump that you can take on the go, a portable one will make life easier and more convenient.
Versatile Flange Range
A breast pump flange, also known as a breast shield, is the piece that you situate over your breasts to create a vacuum seal to ensure efficient and effective pumping. Most double electric breast pumps come with various-sized flanges to accommodate different women. Measuring your nipples prior to purchasing a pump can help you determine your size so that you can choose your breast pump accordingly.
Flange sizes range from 10 mm to 40 mm, and the average size included with most breast pumps is 24 mm. Many manufacturers offer additional accessories and flanges for those who need an alternative option not provided with the pump.
A Carrying Case
Carrying cases make transporting your breast pump more discreet and convenient. However, whether a breast pump comes with a carrying case shouldn’t be a dealbreaker. If you find a pump that you love that doesn’t have a carrying case, you can easily transport it in a diaper bag or purchase a tote bag specifically designated for your pump.
Some pumps have units that are built into the carrying case for easy transport, like the Medela Pump In Style Advanced models. Others come with a bag designated for transporting the pump.
A Cooler
Select breast pumps come with coolers specifically designated for storing breastmilk. Coolers are valuable for women who need to store breastmilk during the day after pumping at work or anywhere else outside the home. They’re ideal for working mothers who want a discreet solution for storing breastmilk and don’t want to rely on the break room refrigerator. They also provide a convenient way to store breastmilk when pumping on road trips.
These coolers typically come with custom ice packs, and are small, compact, and can store several bottles of breastmilk at a time. If you find a breast pump that doesn’t come with a cooler, you can buy one separately that will work best for your needs.
A Letdown Feature
Many breast pumps have a letdown phase setting, which is a feature that helps promote optimal milk supply while pumping. Most pumps that have this feature allow for a two-minute interval that can be bypassed as needed. The setting helps mimic natural breastfeeding to ensure optimal comfort and adequate milk production.
A Hospital-Grade Rating
For some women, having a pump with a hospital-grade filter is necessary for multiple reasons. Hospital-grade breast pumps have closed systems that ensure milk and any other fluids will never enter the motor. They’re resilient, have a quiet motor, are built to last, and can accommodate frequent use and multiple users. They also have an array of settings to accommodate each woman’s pumping needs and preferences.
These pumps have a high pumping strength and are ideal for women with NICU or premature babies, women with low milk supply, women whose babies are sick or have difficulty latching, and those with any medical condition that prevents them from breastfeeding.
Total Pump Strength
Another feature to look for when choosing a breast pump is the suction strength. Pumps are rated according to their vacuum strength, which is how strongly the pump holds on to breasts while pumping.
However, high strength doesn’t always equate to more milk supply. Increasing the vacuum strength too high can cause discomfort and pain while pumping. Pumps typically range from 200 to 300 mmHg of suction, and the ideal suction strength will all depend on your needs and preferences.
A Quiet Motor
Some breast pumps, like the Elvie Pump, have a quiet motor that ensures optimal discretion when pumping. If you plan to pump in public places or at night while others are sleeping, having a quiet motor is a feature you’ll want to look for. It offers a more discreet experience without sacrificing performance.
Smart Features
Some breast pumps are equipped with smart features that enable users to track pumping sessions through the manufacturer’s app. For example, the Ardo Alyssa Hands-Free connects to the MyArdo app, where you can track your pumping sessions and your baby’s growth. You’ll also have access to personalized content and can utilize resources on the app.
Having a smart pump isn’t a necessity, but for some women, it will prove beneficial. The Elvie is another popular breast pump that’s controlled by an app. The app has an automated milk tracking system and offers smart pumping rhythms to ensure optimal milk extraction. If you think you’ll benefit from smart features and would like to track your pumping sessions, finding a smart pump will be a good option.
Extra Accessories
Aside from carrying cases and coolers, you may want to find a pump with extra accessories like bottle nipples and extra parts for convenience purposes. As you search for the right breast pump, read through the list of what’s included in the box so that you know exactly what you’re getting and can purchase additional items if needed.
A Manufacturer’s Warranty
Electric breast pumps aren’t inexpensive, which is why purchasing a breast pump with a warranty is the easiest way to protect your investment. Most breast manufacturers provide a one to two-year warranty that covers defective parts or pump malfunctions.
These warranties typically won’t cover accidental damage or issues that result from normal wear and tear. Keep in mind that purchasing your pump well before you need it will shorten your warranty, so once you find the right pump, remember that your warranty begins as soon as you purchase it.
If you’re shopping for a breast pump that’s right for your lifestyle, budget, and needs, we can help. We carry the most popular pumps and accessories and have the resources you need to help you make the right decision.
Need help? Give us a call at 888-495-7491 Monday - Friday, 8:30 a.m. - 5:30 p.m. and Saturday/Sunday 9:00 a.m. -- 5 p.m.
Translate »
Manage Consent
To provide the best experiences, we use technologies like cookies to store and/or access device information. Consenting to these technologies will allow us to process data such as browsing behavior or unique IDs on this site. Not consenting or withdrawing consent, may adversely affect certain features and functions.
Functional
Always active
The technical storage or access is strictly necessary for the legitimate purpose of enabling the use of a specific service explicitly requested by the subscriber or user, or for the sole purpose of carrying out the transmission of a communication over an electronic communications network.
Preferences
The technical storage or access is necessary for the legitimate purpose of storing preferences that are not requested by the subscriber or user.
Statistics
The technical storage or access that is used exclusively for statistical purposes.The technical storage or access that is used exclusively for anonymous statistical purposes. Without a subpoena, voluntary compliance on the part of your Internet Service Provider, or additional records from a third party, information stored or retrieved for this purpose alone cannot usually be used to identify you.
Marketing
The technical storage or access is required to create user profiles to send advertising, or to track the user on a website or across several websites for similar marketing purposes.