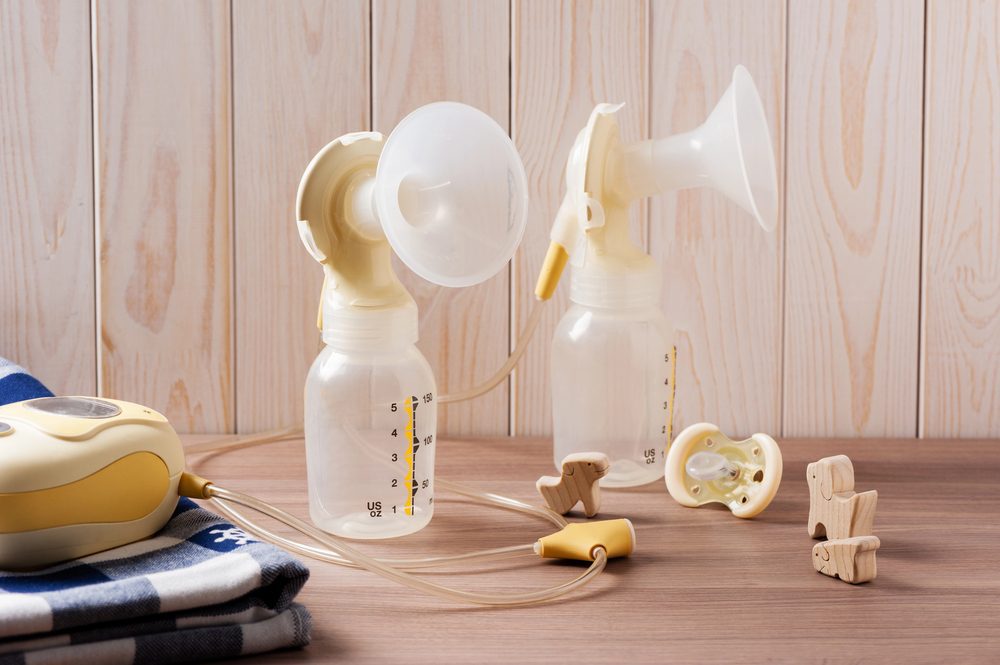
As a nursing mom, you already juggle enough, so pumping shouldn’t add to the stress. With a setup that fits seamlessly into your daily rhythm, you can make each session feel effortless. One smart way to facilitate that is creating a storage-organization system for your breast pump accessories and replacement parts, so everything is exactly where you need it.
Why Proper Storage Transforms Your Daily Routine
Make Life Easier
Free time is scarce for new moms, so when you finally have a moment to pump, it’s much easier to strike while the iron is hot if you know exactly where all your pieces are. There’s no mad scramble through drawers or the pang of discovering a forgotten valve tucked in a bag from weeks ago.
Enhance Safety
Properly storing your breast pump parts after a session or a cleaning can help improve the longevity of your components. Damp parts left in a sink invite bacterial growth, while tangled tubing can crack and disrupt suction. Following sound storage practices can prevent potential damage and save you money in the long run.
Clear Your Mind
A well-organized setup provides mental clarity. There’s nothing worse than being sleep deprived after a night of late feedings, and you open your cabinet door to breast pump parts tumbling out of it. Organizing the chaos will help you keep a clear mind when you’re running on empty and tending to your little one.
1. Selecting Containers That Fit Your Space
Start by choosing transparent, compact containers so you can see what you need at a glance and grab it easily. Clear bins with secure lids keep everything visible while protecting your parts from dust. For safety, opt for BPA-free plastic or food-grade silicone organizers. Stackable containers and tray dividers can also help you stay organized while maximizing your space.
2. Organizing Breast Pump Accessories and Replacement Parts
The placement of your parts should be arranged based on how frequently you use them. Place your everyday-use items front and center. That way, you can grab them without fumbling through a sea of different pump pieces and assemble them even with your eyes half-closed.
For the pieces you swap less often, like backup flanges or extra tubing, carve out a secondary zone that’s out of the way but easy to access during those inevitable “oh no” moments.
Layer in seasonality if your climate or routine is likely to shift. In humid summers, you might elevate the moisture-prone items to a drier spot, while in winter you might need insulated pouches to keep the cold from stiffening up any silicone components.
3. Labeling and Tracking for Easy Navigation
A simple marker and tape are all you need to level up your storage system. Label parts with dates if they tend to have a shorter shelf life, like the date of installation for valves or the suggested replacement date for tubing, so you can track things without all the guesswork. Once you’ve written all these things down, you don’t have to keep space in your brain for remembering it all.
Extend this practice to keeping a quick log, which can be a notebook by your pump or an app on your phone, where you jot notes about replacements and needs. “New membrane boosted output—keep this brand,” for instance. This will also build your knowledge base so you can tweak your setup for optimal output.
Embrace color-coding if visuals are your thing. Try blue for daily use and red for backups so you can just do a quick scan and grab what you need. This also comes in handy when a babysitter or house cleaner stops by, making it easy for them to learn your system and find their way around the kitchen. Over time, refine the system and discard what no longer serves.
4. Keeping Cleanliness at the Heart of Your Storage
After each use, clean and air-dry everything thoroughly before nestling things away. Keep a dedicated rack that lets the breeze work its magic. Your storage spot will thus stay dry and mold-free.
Incorporate routine soaks with a vinegar solution for an extra barrier against buildup, and then rinse and dry the pieces thoroughly before storing them away. For spares, consider vacuum-sealing them to lock out air and microbes so you can have confidence that they’re ready to go without needing to clean them again before use.
5. Choosing Portable Solutions for On-the-Go Pumping
If you’re traveling or out-and-about and need your pump to tag along, you want to ensure all the parts are easy to access. Ideally, you need a setup where you can simply grab-and-go whenever you want to leave the house.
Insulated totes with padded dividers are the perfect solution. They cushion valves during transport while keeping temperatures in the safe-zone for milk storage. Zip in a travel kit of essentials that is clearly labeled for airport scans or quick bag changes. While it might seem like a lot of prep work, it lets you nurse on your terms without tethering you to home.
When everything you need for your pumping is organized and clear, it helps you reach and sustain your pumping goals. For help in finding the right pumps and accessories for your journey, visit us today at Breastpumps.com.
If you’re shopping for the right breast pump for your budget and lifestyle and are overwhelmed by all the options, you’re not alone. Whether you’re a first-time mom or a seasoned mom who needs a replacement pump, there are plenty of double electric breast pumps on the market that you can choose from. Before you buy, knowing what features to look will help you make the best choice for your lifestyle, budget, and needs.
What Features to Look for When Shopping for Double Electric Breast Pumps
A Portable Pump
If you plan on pumping outside the home, whether at work or anywhere else on-the-go, portability will be an important feature to look for. Portable breast pumps either come with a rechargeable battery or are battery-operated.
These double electric breast pumps are easy to transport and don’t require a power cord to operate. If you’re looking for a breast pump that you can take on the go, a portable one will make life easier and more convenient.
Versatile Flange Range
A breast pump flange, also known as a breast shield, is the piece that you situate over your breasts to create a vacuum seal to ensure efficient and effective pumping. Most double electric breast pumps come with various-sized flanges to accommodate different women. Measuring your nipples prior to purchasing a pump can help you determine your size so that you can choose your breast pump accordingly.
Flange sizes range from 10 mm to 40 mm, and the average size included with most breast pumps is 24 mm. Many manufacturers offer additional accessories and flanges for those who need an alternative option not provided with the pump.
A Carrying Case
Carrying cases make transporting your breast pump more discreet and convenient. However, whether a breast pump comes with a carrying case shouldn’t be a dealbreaker. If you find a pump that you love that doesn’t have a carrying case, you can easily transport it in a diaper bag or purchase a tote bag specifically designated for your pump.
Some pumps have units that are built into the carrying case for easy transport, like the Medela Pump In Style Advanced models. Others come with a bag designated for transporting the pump.
A Cooler
Select breast pumps come with coolers specifically designated for storing breastmilk. Coolers are valuable for women who need to store breastmilk during the day after pumping at work or anywhere else outside the home. They’re ideal for working mothers who want a discreet solution for storing breastmilk and don’t want to rely on the break room refrigerator. They also provide a convenient way to store breastmilk when pumping on road trips.
These coolers typically come with custom ice packs, and are small, compact, and can store several bottles of breastmilk at a time. If you find a breast pump that doesn’t come with a cooler, you can buy one separately that will work best for your needs.
A Letdown Feature
Many breast pumps have a letdown phase setting, which is a feature that helps promote optimal milk supply while pumping. Most pumps that have this feature allow for a two-minute interval that can be bypassed as needed. The setting helps mimic natural breastfeeding to ensure optimal comfort and adequate milk production.
A Hospital-Grade Rating
For some women, having a pump with a hospital-grade filter is necessary for multiple reasons. Hospital-grade breast pumps have closed systems that ensure milk and any other fluids will never enter the motor. They’re resilient, have a quiet motor, are built to last, and can accommodate frequent use and multiple users. They also have an array of settings to accommodate each woman’s pumping needs and preferences.
These pumps have a high pumping strength and are ideal for women with NICU or premature babies, women with low milk supply, women whose babies are sick or have difficulty latching, and those with any medical condition that prevents them from breastfeeding.
Total Pump Strength
Another feature to look for when choosing a breast pump is the suction strength. Pumps are rated according to their vacuum strength, which is how strongly the pump holds on to breasts while pumping.
However, high strength doesn’t always equate to more milk supply. Increasing the vacuum strength too high can cause discomfort and pain while pumping. Pumps typically range from 200 to 300 mmHg of suction, and the ideal suction strength will all depend on your needs and preferences.
A Quiet Motor
Some breast pumps, like the Elvie Pump, have a quiet motor that ensures optimal discretion when pumping. If you plan to pump in public places or at night while others are sleeping, having a quiet motor is a feature you’ll want to look for. It offers a more discreet experience without sacrificing performance.
Smart Features
Some breast pumps are equipped with smart features that enable users to track pumping sessions through the manufacturer’s app. For example, the Ardo Alyssa Hands-Free connects to the MyArdo app, where you can track your pumping sessions and your baby’s growth. You’ll also have access to personalized content and can utilize resources on the app.
Having a smart pump isn’t a necessity, but for some women, it will prove beneficial. The Elvie is another popular breast pump that’s controlled by an app. The app has an automated milk tracking system and offers smart pumping rhythms to ensure optimal milk extraction. If you think you’ll benefit from smart features and would like to track your pumping sessions, finding a smart pump will be a good option.
Extra Accessories
Aside from carrying cases and coolers, you may want to find a pump with extra accessories like bottle nipples and extra parts for convenience purposes. As you search for the right breast pump, read through the list of what’s included in the box so that you know exactly what you’re getting and can purchase additional items if needed.
A Manufacturer’s Warranty
Electric breast pumps aren’t inexpensive, which is why purchasing a breast pump with a warranty is the easiest way to protect your investment. Most breast manufacturers provide a one to two-year warranty that covers defective parts or pump malfunctions.
These warranties typically won’t cover accidental damage or issues that result from normal wear and tear. Keep in mind that purchasing your pump well before you need it will shorten your warranty, so once you find the right pump, remember that your warranty begins as soon as you purchase it.
If you’re shopping for a breast pump that’s right for your lifestyle, budget, and needs, we can help. We carry the most popular pumps and accessories and have the resources you need to help you make the right decision.
Whether you’re an expecting mother, a working mother, or a stay-at-home mother, it’s important that you have the right hands-free breast pump to accommodate your active lifestyle. Because there are so many hands-free pumps available, choosing the right one can feel overwhelming. However, once you know what to look for, you can narrow down the options and make the best decision for your needs.
How to Choose the Best Option Among the Hands-Free Breast Pumps Available for Active Moms
Check If the Breast Pump Comes With a Warranty
Hands-free breast pumps are an investment, especially if your insurance company doesn’t provide you with one at no cost. For that reason, it’s recommended to find a breast pump that comes with a warranty.
The best breast pumps will come with a manufacturer’s warranty that ranges anywhere from one to three years on parts and the pump itself. If something goes wrong with the breast pump within the first few years of owning it, the manufacturer will cover the cost of replacement or provide you with replacement parts, so you won’t be left without a working pump for long.
Determine How Often You’ll Use Your Breast Pump
As a new mother, it may be hard to determine when and how often you plan to pump, especially if you don’t know how breastfeeding will go for you. There are so many unknowns with breastfeeding when you’ve never experienced it before.
If you end up facing challenges after giving birth or while breastfeeding that require more supplemental pumping than you expected, having a high-quality pump ready will make all the difference, whether you use it frequently or infrequently.
Explore Your Options
One of the benefits of advancements in hands-free breast pumps is that there are now options designed to accommodate different types of active mothers. The goal of a breast pump is to make feeding your baby easier and support your active lifestyle.
Hands-free pumps are convenient regardless of whether you work in or outside the home, but finding the best breast pump ultimately comes down to choosing one that will meet your needs and accommodate your lifestyle postpartum. That’s why reading more about the options and their features is key.
Available Accessories and Features
Many of the pumps designed for frequent use are ideal for active mothers because they have Wi-Fi connectivity and come with tote bags, ice packs, coolers, car chargers, and extra features and accessories to accommodate those who plan to pump more than breastfeed. These features may be unnecessary for mothers who plan to stay at home or use their breast pumps infrequently, while they’ll prove invaluable for others.
Women who need to pump throughout the workday, store a day’s worth of breast milk at the office, and transport their pump to and from work each day will need pumps with advanced features and settings and extra accessories. Women who plan to use their pump on an as-needed basis and want to primarily breastfeed may be better suited for a hands-free pump that’s designed for home use.
Hospital-Grade Pumps
Hospital-grade pumps are a separate category of breast pumps that have a higher price tag because of their advanced technology and features. Some women will be limited to a hospital-grade pump due to circumstances surrounding their birth, like needing to establish milk supply, difficulty nursing, feeding twins, or feeding a NICU baby.
Hospital-grade pumps have high suction levels, are designed for frequent use, and have closed systems, making them sterile and able to be used by multiple users.
Read Reviews
Reading reviews before choosing a hands-free breast pump can help you learn more about which options other active moms prefer. There are plenty of women who have gone before you and have chronicled their experience with particular pumps, both through reviews and on personal blogs or social media accounts.
Consider Where You’ll Primarily Use Your Pump
How often and where you plan to pump will help determine whether you need a portable option. Some hands-free pumps are portable and are either battery-operated or come with a rechargeable battery. While the majority of pumps on the market are portable, there are a few that are not and are better for at-home use.
Having a portable pump is ideal if you want to pump anywhere other than your home and don’t want to rely on a power cord. If this is the case for you, be sure to compare battery life between your top contenders to ensure you choose one that meets your on-the-go pumping demands.
Determine Your Flange Size
Breast pumps come with breast shields, which are also called flanges. Flange size can affect different aspects of pumping, including the effectiveness and efficiency of the pump and your overall comfort during the process. You can measure your nipples during the final weeks of pregnancy to determine your approximate flange size, and then again two weeks postpartum for the most accurate measurement.
If you’re uncertain about flange size, choose a pump that offers the most flange options so that you don’t have to find a better option once you start pumping.
Check If Your Insurance Company Provides Coverage
Some insurance companies will provide you with a breast pump at no cost. If that’s the case, you’ll likely be limited to the options they provide. If those no-cost pump options don’t accommodate your needs and lifestyle, purchasing your preferred option may be the best solution.
Determine Your Budget
Like most products, breast pumps range in price based on their features, brand, quality, and the number of accessories that come with that pump. Some pumps may require that users purchase replacement parts at some point for safety, longevity, maintenance, and hygiene purposes.
Once you determine how much you want to or can spend on a breast pump, you can rule out certain options and shop within your range.
Prioritize Simplicity
Choosing the right hands-free breast pump all comes down to comfort, efficiency, and ease of use. During those first few weeks postpartum, life will be a blur. The last thing you want to do is try to learn how to make your breast pump work, which is why it’s important that you choose one that is both easy to use and effective.
Your time should be spent with your baby, bonding, and providing for his or her needs, not troubleshooting a breast pump. As you read reviews and consider your options, look for one that’s highly rated for its effectiveness and that’s known for its ease of use.
Research the Manufacturer’s Website
Once you find a breast pump that will meet your needs, visit the manufacturer’s website. It’s important to learn about the brand, the product, the warranties, and the available accessories.
Knowing what your pump comes with and what it doesn’t ahead of time will ensure you’re prepared and have everything you need to efficiently feed your baby. It will also help determine if you need to purchase extra items, so you can budget accordingly.
When you know what to look for in a breast pump, choosing the right option will be simple and stress-free. If you need resources to help you make the best decision, or need a reliable source from which to buy your breast pump, we can help.
Visit us today at breastpumps.com for more information about the available breast pumps and explore our resources designed for new and active moms.
Through three long trimesters, a plethora of pre-natal appointments and bellies that swelled bigger each week, we did everything in our power to have a healthy pregnancy. Now our bundle of joy is here, and we’re focused on keeping our little one thriving with a steady supply of breast milk. Everyone knows that breast is best, and we’re happily giving our new addition their tailor-made supply of nutrition straight from our bodies. However, there’s one issue that breastfeeding mothers don’t always agree on, and that’s alcohol. Is the occasional glass of wine after baby’s in bed okay, or should we forget about imbibing until our little guy is weaned? If we do indulge, do we need to “pump-and-dump,” or can our little one take their midnight meal as usual? Read on to find out everything there is to know concerning alcohol and breastfeeding.
Pour the Myth of Pump-and-Dump Down the Drain
Considering how many times the term has been on the lips of our fellow moms, it’s amazing how little credibility there is to the idea of pumping and dumping. As this article from Romper explains, because alcohol leaves the body without a mother doing anything at all, the action of pumping breast milk and pouring it down the sink will do nothing but waste time and energy. Any remaining breast milk in the body will still contain a percentage of that glass of wine or bottle of beer, so turn away from the gossip and focus on the facts. Instead of condemning ourselves to sore nipples and spilled milk, we nursing mothers can gladly enjoy a drink or two as long as we indulge responsibly and make sure to properly wait before feeding our baby. The CDC offers a great guide on how long to wait depending on the amount of alcohol you’ve consumed, and further clarifies the ineffectiveness of the pump and dump method.
The Smart Way to Drink
Drink responsibly. It’s another phrase we’ve heard a hundred times, but this one carries a lot more clout. Along with avoiding the entire pump-and-dump process, breastfeeding mothers can consume alcohol without feeling an ounce of guilt. It’s perfectly fine to have that glass of wine during girls’ night or to grab a beer when watching a movie with the hubby. As this article by KellyMom states, less than 2 percent of the alcohol we drink actually reaches our breast milk, and research has shown that an occasional one or two drinks is not harmful to a nursing baby.
How Much is Too Much?
However, just because our little ones won’t be slurring their words or feeling a buzz doesn’t mean we should let down our guard. Consuming any amount of alcohol can make an adult less coordinated, and we all know that walking through the obstacle course of a child’s toy-filled room is hard enough when we’re completely sober. For this reason, it’s best to have our special drink after all children are snoozing away peacefully. With everyone asleep, there’s no need to worry about searching the house for a lost teddy bear or favorite book, and we can simply relax and have a moment to ourselves. Furthermore, younger babies who are still prone to middle-of-the-night wake-ups will have time to snooze for a couple of hours, precisely the amount of time needed for our milk supply to be alcohol-free and ready for their midnight snack. For a definitive guideline on how much is too much, go by the rule this article from MamaNatural suggests, and don’t nurse if you wouldn’t drive a car.
Happy Moms Equal Happy Babies
We know there’s nothing more important than keeping our little ones happy and healthy, and we also know that breastfeeding is an integral part of that equation. However, a stressed-out mom inevitably leads to a temper tantrum, and not just from the baby! Sometimes we nursing moms need a moment to ourselves, and research has proven that moment can safely come in the form of an occasional drink. Without the aggravating myth of pump-and-dump around to concern us, we can be confident that imbibing every once in a while is perfectly safe. In fact, tonight seems perfect to try out a glass of that new bottle of wine!
If you’re nursing and traveling without your baby, you’ll need to bring along your breast pump and extra supplies and accessories to ensure your trip goes smoothly.
Be sure to bring your normal supplies, plus extra batteries, cleaning supplies and milk storage containers.
We recommend traveling with your pump in your carry-on luggage to avoid it potentially being damaged or lost with baggage.
Mothers are allowed to travel with breast milk and breast pumps in the United States, regardless of whether they are traveling with or without their children.
If you are hassled or stopped in airport security, ask to speak to a supervisor.
Although pumping en route presents some unique challenges, it can be worth the extra effort.
Breastfeeding can be challenging, frustrating, emotional, rewarding, and incredibly wonderful all at once. Mixed with the rigors of travel for business or even family visits with baby in tow, traveling away from home while still breastfeeding is one of the biggest challenges faced by today’s mothers.
Although pumping or breastfeeding while in the air or on the road can be uncomfortable, inconvenient and downright unpleasant, many mothers find it worthwhile, particularly since it allows them to continue their breastfeeding journey without disruption.
Lactating moms can benefit from planning ahead, regardless of whether you’re bringing baby along for a family visit or leaving your child with your partner for a business trip. We’ve put together some tips to help you prepare for those trips both with and without your little one while continuing your breastfeeding journey.
Pump Supplies Checklist
If you’re nursing and traveling without your baby, you’ll need to bring along your breast pump. Pumping while traveling requires a few additional supplies, some of which you might not necessarily need when you are at home or if you’re traveling with your baby. This checklist will help ensure you’re ready for anything you might encounter during your travels.
Power cord, pump parts, tubing and breast shields: Next time you pump at home, make a note of all the parts and equipment you need prior to, during and after you have pumped. If you do not have all the essential parts with you, a breast pump is not going to do you any good.
A battery pack and extra batteries: Checking to confirm that your battery pack works before you leave your home and loading your pack with new batteries are among the most important details to remember. Forgetting your battery pack could leave you stranded without a working pump. Depending on the length of your trip, we recommend carrying an extra set or two of batteries. Pack the extra batteries in your carry-on bag can help to avoid any potential problem with checked luggage at the airport.
Adapter or converter: Breast pump electrical adapters often do not adjust to different voltages used internationally. Make sure you research and pack the appropriate power adapter or converter plug when traveling internationally to ensure your pump will work once you arrive at your final destination.
Cleaning supplies: Although accessing a place to scrub and clean the various parts of a pump might not always be possible while traveling, most offices and hotel rooms have a microwave, which is why we recommend purchasing microwave sanitizing bags for your trip. All you need to do is throw everything into these disinfecting bags and pop them into the microwave for about three minutes to ensure everything is sterile for the next use. Be sure to follow the specific manufacturer’s instructions and bear in mind that microwave voltages can vary.
Milk storage containers: If you intend to bring milk back after your trip, be sure you pack enough storage bags or containers. We recommend medical-grade, pre-sterilized storage containers since they are reliable and convenient. If possible, freeze your breast milk flat so that you can easily stack them up on your return trip.
Ice or cold packs: Ice or cold packs will help to keep your milk frozen on the return trip, which can come in handy for long or multi-segment flights. After traveling, putting the milk in a freezer as soon as possible is of the utmost importance since some thawing could occur. Once you get back home, use the milk pumped on the trip as soon as you can.
Hand sanitizer: Just in case you don’t already have one, packing a little bottle of hand sanitizer inside your carry-on is always a good idea.
Pack Smart
Fitting the pump into your small carry-on suitcase would ideal; however, this may not always be an option. You will otherwise have to check your luggage and keep your purse or computer bag and pump as carry-on items.
We suggest refraining from checking a breast pump as a stand-alone piece or in a suitcase. Aside from potentially being damaged in the shuffle, travel delays happen from time to time and luggage can get lost. Arriving at your destination without a functioning pump is the last thing you need on your trip.
Be Security Savvy
It is important to know your rights. Nursing mothers are allowed to travel with breast milk and breast pumps in the United States, regardless of whether pumping mothers are traveling with or without their children. Alerting security that you are traveling with a pump and/or milk upfront makes the process as smooth as possible, but if you are hassled or stopped, you should ask to speak to a supervisor.
The TSA classifies children’s juice, formula and breast milk in the same category as liquid medicine. As such, these substances are not subject to the 3 oz. rule applicable to other liquids and gels. Parents are permitted to pack ice packs, empty bottles, liquid-filled teethers and jarred baby food inside a carry-on as well.
Here are some additional security tips to help you experience a smooth journey through security:
Separate and declare your breast milk and equipment when going through the security checkpoint.
Pull the breast pump out of your carry-on and place it in a separate bin before your bag goes through the x-ray machine.
Inform the agent that it is a breast pump. Although you should be prepared for the possibility of additional screenings, tasting your breast milk is not a requirement. TSA officers might request you to open your containers during the process.
While there is no limit on the quantity of breast milk you can bring aboard in your carry-on, the TSA encourages traveling mothers to only bring the amount of breast milk, juice or formula necessary for that particular trip. If you are carrying breast milk on the return journey, place the milk inside a separate bin and then inform the agents that it is breast milk.
Pumping En Route
You might find it necessary to pump before you reach your destination. Fortunately, most major airports feature family bathrooms fitted with electrical power outlets, which provide a perfect place to pump. If you need to pump while aboard the airplane, especially on international or longer flights, ask the flight attendants to suggest a suitable pumping location.
Worth the Effort
Although pumping en route presents some unique challenges, it is ultimately worth the extra effort. With some planning, preparation, and patience, maintaining your milk production while away from your little one is entirely possible.
BreastPumps.com offers a wide variety of spare parts and accessories to ensure your breastfeeding journey is enjoyable for both you and your baby—regardless of where you’re pumping.
If you are having a difficult time getting your baby to latch properly, a nurse or lactation consultant may recommend the use of a nipple shield.
A nipple shield is a flexible, soft silicone nipple that fits over your nipple and areola that can help your baby latch on properly as you both get used to breastfeeding.
Research has shown that premature infants who nurse with nipple shields intake more milk than infants who don’t use a nipple shield when nursing.
Nipple shields can also help transition babies from bottles to breastfeeding.
Because your baby may not be able to completely drain your breast with the nipple shield, it’s important to use a breast pump after nursing, keeping your milk supply up and reducing the risk of plugged milk ducts.
If you are having a difficult time getting your baby to latch properly, a nurse or lactation consultant may recommend the use of a nipple shield. A nipple shield is a flexible, soft silicone nipple that fits over your nipple and areola. Using a nipple shield can help your baby latch on properly as you both get used to breastfeeding.
When to Use a Nipple Shield
A nipple shield can be helpful for you to use in several situations. These situations include:
Breastfeeding a baby who is premature, small or ill – The nipple shield holds the nipple in an extended state, which will allow your baby to latch and nurse easier. Research has shown that premature infants who nurse with nipple shields intake more milk than infants who don’t use a nipple shield when nursing.
Flat or inverted nipples. The nipple shield can help hold inverted or flat nipples in the proper position for the baby to latch on properly.
Switching babies from bottle to breast – Silicone nipple shields have a similar texture to bottles, providing comfort for babies who refuse or are used to breastfeeding without the aid.
Cracked or bleeding nipples – An improper latch may traumatize your nipples, making it extremely painful to breastfeed. A nipple shield can help protect sensitive nipples while they heal.
Disadvantages to Using a Nipple Shield
Your milk supply may decrease as a result of your nipple not being directly stimulated.
You are at an increased risk of developing blocked milk ducts and mastitis because of decreased milk transfer.
It can be difficult to wean your baby off of the nipple shield.
Different Types of Shields
Nipple shields are either formed from silicone, latex or rubber. They come in different sizes ranging from small to large. It’s important to choose the proper size in order to fit both your baby’s mouth and your nipple. Some types of nipple shields have a cut out lower portion, which allows more skin-to-skin contact.
Using a Nipple Shield
How to Use a Nipple Shield
Place the shield onto your nipple with the brim of the shield upturned. Once the nipple is in place, smooth out the edges. The will help the shield to stick to your breast. If you still have difficulty in getting the shield to stay properly, try moistening the edges only with a little water. If your nipple doesn’t fit into the shield properly, try the next size up, ensuring that it isn’t too large for your baby’s mouth.
Remember to Pump
Your body will make breast milk based on “supply and demand.” The more milk that is removed from your breast, the more that your body will make. Because your baby may not be able to completely drain your breast with the nipple shield, it’s important to use a breast pump after nursing to express the milk as your body regulates itself. Without a breast pump, your milk supply may decrease if your baby can’t remove all of the milk he or she needs. Pumping can also reduce the risk of plugged milk ducts. Most insurance companies will provide you with a breast pump at no cost to you.
When Not to Use a Nipple Shield
If your baby isn’t having at least six wet diapers a day and isn’t gaining weight, you may need to discontinue using a nipple shield and try a different method (such as pumping) while you work on your latch. Talk with your doctor, lactation consultant or nurse for help.
Tips for Weaning Your Baby from the Nipple Shield
As your baby grows and you become more comfortable with nursing, you won’t need to continue to use your nipple shield. Because your little one will be used to using it, however, it may take some time to wean your baby from the nipple shield. Try these methods:
Pumping for a few minutes before breastfeeding until your milk has “let down.”
Applying cold water or ice to your nipple for a few seconds to harden it.
Breastfeeding without the nipple shield while your baby is very sleepy.
Breastfeeding more often than usual. If you wait until your baby gets too hungry, he or she will be more likely to reject your breast without the shield.
Try nursing in different positions.
How to Care for Your Nipple Shield
Because it’s coming into contact with your baby’s mouth and your breast, it’s important to clean your nipple shield after every feeding. Wash your nipple shield in hot, soapy water and allow it to air dry. Boil it once a day in a pot of water for 20 minutes to keep it sanitized.
Using a nipple shield can help you nurse successfully while your baby grows or while your nipples heal. Be sure to use a nipple shield with the help of a lactation consultant or nurse for the best results.
For more information or parenting support, visit our blog.
Need help? Give us a call at 888-495-7491 Monday - Friday, 8:30 a.m. - 5:30 p.m. and Saturday/Sunday 9:00 a.m. -- 5 p.m.
Translate »
Manage your privacy
To provide the best experiences, we use technologies like cookies to store and/or access device information. Consenting to these technologies will allow us to process data such as browsing behavior or unique IDs on this site. Not consenting or withdrawing consent, may adversely affect certain features and functions.
Functional
Always active
The technical storage or access is strictly necessary for the legitimate purpose of enabling the use of a specific service explicitly requested by the subscriber or user, or for the sole purpose of carrying out the transmission of a communication over an electronic communications network.
Preferences
The technical storage or access is necessary for the legitimate purpose of storing preferences that are not requested by the subscriber or user.
Statistics
The technical storage or access that is used exclusively for statistical purposes.The technical storage or access that is used exclusively for anonymous statistical purposes. Without a subpoena, voluntary compliance on the part of your Internet Service Provider, or additional records from a third party, information stored or retrieved for this purpose alone cannot usually be used to identify you.
Marketing
The technical storage or access is required to create user profiles to send advertising, or to track the user on a website or across several websites for similar marketing purposes.