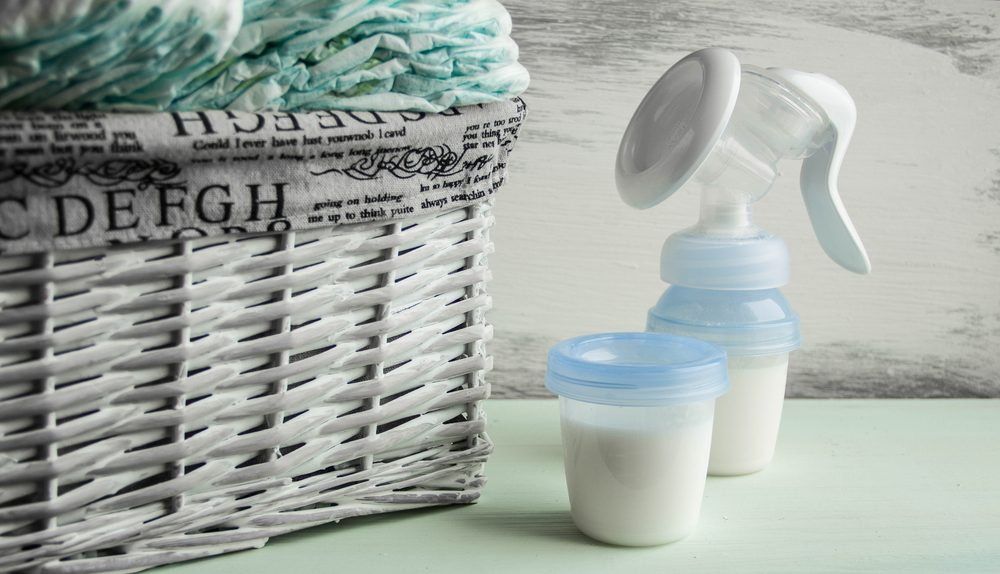
Getting a free pump through insurance is your right under the Affordable Care Act, but like anything related to insurance, it can get complicated and even frustrating. You can really simplify the process by preparing in advance, and successfully getting yours depends on knowing exactly what to have ready and when to act. Or, you can skip a lot of the red tape in the eligibility process when you contact a provider who can deal with the insurance process for you.
Getting Your Insurance Breast Pumps
Get Familiar With the Rules
The Affordable Care Act requires most health plans to include breastfeeding support services and supplies, and that includes a breast pump at no cost to you in the form of copays or deductibles. This applies to both new and expectant mothers, and the pump is considered durable medical equipment.
Check Out Your Specifics
The overall rules are the same, but within those rules, there’s room for plans to vary, and they do. Some will fully cover a standard double electric model, while others allow for upgrades to more portable or hands-free styles if you pay a small difference out of pocket. Medicaid plans in many states follow similar guidelines but may have stricter limits on the type of pump or when you can order it. Private employer plans are usually similar, but self-funded plans sometimes opt out of certain requirements.
Start by pulling out your insurance card and reading through your plan documents. Look specifically for sections on preventive services, maternity benefits, or durable medical equipment, and remember that your breast pump details might be in more than one section. Since many plans post their full policy details online through a member portal, your best bet is often just to log in and search terms like “breast pump” or “breastfeeding equipment” to see exactly what is listed as covered.
Write Down the Important Info
Pay close attention to any notes about quantity limits, though one pump per pregnancy or birth is usually standard, and especially whether accessories like replacement flanges, tubing, or bottles are included. Some plans will cover a one-month or three-month supply of parts at no extra cost, but not all will.
Write down any restrictions you see, like requirements to use in-network suppliers. If you cannot find clear answers, call the number on your card and ask to speak with a representative about breastfeeding equipment benefits. Have a pen and paper ready so you can jot down the representative’s name, the date of the call, and the exact details they provide.
Get Personal Details Ready to Apply
Next, gather every piece of personal information you will likely need. You’ll definitely be required to give your full name, date of birth, mailing address, and phone number, and you might also need your estimated due date or your baby’s actual birth date if you’ve already delivered. Keep your obstetrician’s or midwife’s contact details close because a prescription or letter of medical necessity might also be required.
Create a simple folder on your computer or phone with digital copies of your insurance card, plan summary, and any prenatal records that mention breastfeeding support. Organizing these now means you don’t have to hunt for them later when you’re tired and dealing with all the demands of a newborn.
Talk to Your Healthcare Provider
Talk about your plans during a prenatal visit and explain that you intend to request a breast pump through insurance: ask if they can provide a prescription in advance. Many doctors are familiar with the process and will already know the type of pump that best suits your situation. If you have multiples, a history of low supply, or you plan to pump exclusively, make sure the prescription reflects your actual medical needs.
Time Things Right
Timing matters more than most people realize. Although you can start gathering information at any point during pregnancy, many plans will not begin processing orders until either thirty to sixty days before your due date or after delivery. This means if you contact your insurance or a supplier too early, you might have a long delay or even a denial because the benefit has not yet become active for that pregnancy.
Mark your calendar with your due date and count backward thirty days as a safe window to begin the formal request. If you are already past your due date or have delivered, act as soon as possible so your coverage window doesn’t close. Keep track of your insurance plan’s renewal date as well, because if you roll into a new policy year between the time you start planning and the time you actually give birth, that could change your benefits or require you to re-verify everything.
Take Time to Look at Your Choices
Think about the kind of pump that will actually fit your daily life so you can request the right one. Standard double electric pumps work well for many mothers. They offer strong suction and the ability to pump both sides at once. But if you need to move around the house or will return to work pretty quickly, a battery-powered or rechargeable model gives you more freedom because you won’t be tethered to an outlet. Hands-free or wearable styles can slip inside a bra and let you pump while folding laundry, answering emails, or caring for older children.
Consider how often you expect to pump, how long your sessions typically last, and whether you want app integration for tracking output or automatic settings that adjust suction. Look at the number of flange sizes included and how easy replacement parts will be to get, as well as their expense.
Prepare for the Eligibility Process
Prepare a checklist of questions you will ask when you finally submit your information to a supplier:
Will they verify your benefits before shipping?
How long does verification usually take?
What happens if your plan requires additional documentation?
Are there any out-of-pocket costs for your preferred model, and how are they calculated?
Can they request a prescription directly from your doctor if you do not have one?
Write your questions down and keep them with your folder of documents so nothing slips your mind during the call or online form. Once you have everything collected, double-check that your contact information is current in your insurance records. If you have secondary insurance, note those details too, even if you don’t expect them to be primary for this benefit. You want to have info on all your options ready to go.
Avoid Unnecessary Delays
Many mothers run into small snags that could have been avoided by doing a bit of upfront work. For example, having an outdated address on your file can delay shipping, and a missing group number on an order form can cause a long delay because you can’t be verified. Review your plan documents and confirm your details with a representative to reduce the possibility you’ll be frustrated by any of these issues.
Visit us at Breastpumps.com today. Our specialists can handle every piece of paperwork and verification, so you simply select your preferred model, let us know the timing, and then receive your pump at home without all the hassle.
When you’re figuring out how to maintain your milk supply while balancing all the demands of being a new mom, it can all feel like too much. And when there’s an issue with your supply or pumping, you might need a little help. Lactation specialists are the perfect go-to resource for getting the essential lactation support and pump guidance you need to figure out your equipment, deal with unexpected pumping issues, and make a schedule that matches your body’s needs.
Lactation Support, Pump Selection, and More
Lactation specialists bring a depth of knowledge that goes beyond the helpful, but very general, advice that you can get from other moms. Drawing from both their clinical training and practical experience, specialists know how to give advice that truly addresses the nuances of how your physiology interacts with mechanical devices designed for milk expression. When you talk to a specialist, expect:
Thorough assessment of your individual situation
Detailed info on pump mechanics and your body
Visual demonstrations
Help in crafting your own plan
Tips for troubleshooting your pump (and your supply issues)
Help for transitioning back to work
Advice for choosing pumps
Follow-up sessions and support
Assessing You as an Individual
A specialist’s involvement begins with a thorough assessment of your individual circumstances, including all relevant factors, such as your medical history, the frequency with which you plan to express milk, and any previous experiences you’ve had that might influence your comfort or efficiency. For instance, if you’ve had issues in previous pregnancies with engorgement or inconsistent let-down reflexes, a specialist can use those details to make specific recommendations to help you avoid that issue in the future.
This initial evaluation can often help you notice an aspect of pumping that you might have overlooked, such as how your nipple size and shape have affected flange compatibility, or how your work schedule requires you to get a pump with specific battery life and noise levels.
Learn About Pump Mechanics and Your Body
A specialist can help you grasp how a pump’s mechanics work in relation to your body’s signals. For instance, your specialist can help you figure out how to adjust your suction strength and cycle speeds to mimic your infant’s nursing patterns. That, in turn, stimulates prolactin release and helps you maintain your milk supply without causing undue strain on your breast tissue.
In these conversations, you gain insight into how different pump types will interact and work well (or not) with your lifestyle and how you can use the customizable settings to experiment with patterns that optimize your comfort and reduce the likelihood of nipple trauma or mastitis development from improper use.
Visual Demonstrations
Nothing helps like seeing for yourself, and your specialist may be able to show you a demonstration that will totally transform an abstract concept into a practical skill, like how to assemble and disassemble components. They can also watch your technique and help you correct any subtle errors that might otherwise go unnoticed and which could be needlessly causing you frustration or keeping you from getting the most out of your pump.
Troubleshooting Tips
A lactation specialist can help you troubleshoot both your pump and your own habits to get the results you’re looking for. For instance, when you know the proper areola compression and can adjust accordingly, you can stop the common issue of restricted milk flow that comes when parts don’t quite fit and you’re not emptying.
If you notice a decrease in expressed volume despite your consistent efforts, your specialist can analyze your pumping log and suggest modifications that might help, like breast compressions or changing the timing of your sessions to better match the peak production window of your own body.
They can also help you connect these technical elements to any broader emotional and psychological factors that could be an issue. Anxiety about supply, for instance, can actually inhibit oxytocin release, but if you learn how to engage in deliberate relaxation during your sessions, everything may feel more intuitive and less mechanical.
Transitioning to Work
Transitioning back to your professional obligations will always be a little tough, and a specialist can help you craft the right plan to incorporate pumping into your day without overwhelming your schedule, advise you on how to build up a freezer stash gradually while maintaining direct feeding, and explore options for discreet expression at work.
There are pumps with quiet motors and hands-free features that allow you to multitask, for instance, but it’s important to know how these might function differently from your primary, at-home pump. You can also get some guidance on milk storage and handling so you can get back to life with a schedule that works for you and confidence that your baby will have everything he or she needs.
Advice for Choosing Pumps
When it comes to the actual selection process, lactation specialists can help you practically weigh your preferences against issues like the pump’s efficacy, cost, insurance options, and more. They have a lot of familiarity with all the models that have proven reliable in real-world applications and also know how to warn you off any overhyped products that are all about aesthetics but don’t have the functionality you need. They can explain the differences among portable, battery-operated, stationary, double-electric, and hospital-grade pumps in very practical terms that make sense to your needs.
They’ll also be familiar with the integration of technology in modern pumps and can give you tips on which apps are best while also helping you remember to always listen to your body’s cues no matter what an app might say. And once you have your new pump, your specialist can help you get it into your preferred configuration right away.
Follow-Up Sessions and Support
The whole point of your sessions is empowerment. The goal is to equip you with the knowledge you need to self-assess and adjust independently and take full control of your schedule and life. Your lactation specialist can also help you access community resources like support groups or online forums where you can get insight from your peers to complement the expertise you get from a specialist.
Follow-up sessions with your specialist can also give you ongoing support to review your progress, adjust for baby growth spurts that might temporarily increase demand, or even help with things like addressing seasonal allergies that indirectly affect your supply through dehydration. Ultimately, your lactation specialist is someone on your side, committed to demystifying the technical side of milk expression, and giving you practical and evidence-based tips and information that help you make your equipment work for you instead of the other way around.
Armed with their information and advice, you’ll find yourself better and better able to handle changes, adapt to challenges and keep up your own well-being during one of the most demanding times of life.
Pump Guidance and More
At Breastpumps.com, we’re so much more than breast pumps. We help you buy the pump you need and deal with your insurance for you along the way, but we also have videos, a mommy blog, community forums, and lactation specialists all ready to help you succeed. Visit Breastpumps.com now to learn more and get help.
Has your breast pump stopped working properly? We get how frustrating and upsetting that is. It always happens at the worst possible moment, and figuring out the next steps can feel completely overwhelming, especially when you’re relying on that pump daily and now all your plans are thrown into chaos. We can give you the breast pump support you need and help you figure out your warranty claims.
First Steps When You Notice a Problem
Start by assessing what’s going on with your pump. Many issues aren’t actually a total malfunction but something that a simple fix will take care of.
Power?
Always start by checking if the power source is the culprit. If it’s a corded model, make sure the outlet works by plugging something else into it to check. Look to see that the cord isn’t damaged, either.
Battery?
For battery-operated pumps, replace the batteries or ensure the rechargeable unit is fully charged. Sometimes, a low battery can make the suction feel weak or inconsistent even if you’re not technically being told yet that it’s time to charge.
Connections?
Next, inspect the tubing and connections. Cracks, kinks, or loose fittings can disrupt the vacuum seal and give you poor performance. Gently clean these parts with warm soapy water, rinse them thoroughly, and let them air dry. Avoid boiling or microwaving any of these parts unless the manufacturer specifically recommends it, as that could warp the materials.
Flanges?
Examine the flanges, which are the parts that fit over your breasts. If they’re the wrong size, it might not be a malfunction at all but a fit issue that’s causing you discomfort or low output. Most pumps come with standard flange sizes, but you might need inserts or different ones altogether. Or, you might have simply picked up the wrong size by accident.
Document the Issue
If cleaning and basic checks don’t help, document the problem so you’ll be ready to talk on the phone about it. Write down exactly what is happening and take photos or a short video if possible, as this can be useful later. Keep your original packaging, receipt, and any registration details handy.
Check Out Manufacturer Troubleshooting Help
Troubleshooting resources are often available directly from the maker. For instance, Medela provides detailed guides in their user manuals and online, and they’ll suggest you go through a few steps like resetting the pump by unplugging it for a few minutes. Similarly, Spectra offers a support line where consultants can walk you through diagnostics over the phone.
Common Causes of Malfunctions and How to Troubleshoot Them
Breast pumps are like any machine and can have issues over time. Here are some of the most common:
Weak Suction: Worn-Out Parts
One frequent problem moms face is weakened suction, which is often due to worn-out valves or membranes. These small silicone parts create the pump’s rhythm and typically need to be replaced every few months, depending on how often you use the pump. If you’ve been pumping multiple times a day, check the manufacturer’s guidelines for replacement intervals on your model.
Motor Failure: Isolate the Issue
Another issue could be motor failure, where the pump turns on but doesn’t cycle properly. This might happen because of overuse, exposure to moisture, or a manufacturing defect. But before assuming it’s broken, try running the pump without the collection kit attached to isolate if the problem is in the motor or the accessories. If the motor hums normally on its own, the issue might be in the tubing or flanges.
No Charge: Battery Issues
For wearable pumps, battery life and charging ports are common trouble spots. If your pump isn’t holding a charge, test it with a different cable or charger to make sure it’s not the accessory that has the fault.
Accessing Breast Pump Support
When home troubleshooting doesn’t cut it, reaching out for help is your next move. Start with the company where you got your pump, which you can do via our team at Breastpumps.com. Our support team is equipped to handle questions about the models we provide, and we can connect you with lactation specialists who understand not just the tech but how it fits into your routine.
If the issue persists, we’ll guide you to contact the manufacturer directly. Each brand has its own support channels, but always be prepared to provide your pump’s model number, serial number, and purchase date. These are usually on the bottom of the unit or in your order confirmation.
Your Support Call
During the call, describe the problem clearly and mention what you’ve already tried. Support reps might ask you to perform additional tests, like checking for blockages in the system or verifying the pump’s settings. If they determine it’s a malfunction, they’ll guide you toward the next steps, which could include sending in the pump for inspection or just issuing you a replacement if it’s under warranty.
Filing Warranty Claims
Once you’ve confirmed the malfunction isn’t fixable through troubleshooting, it’s time to proceed with a claim. Most breast pumps come with a manufacturer’s warranty, and you’ll usually have coverage for one to two years from the purchase or shipment date, though this varies by brand. Accessories like flanges or valves usually have shorter coverage of around 90 days.
To start, you’ll need proof of purchase. For pumps sourced from us at Breastpumps.com, your order details can serve this purpose. Fill out the brand’s warranty form, and be honest and detailed in your description. Include the symptoms you’re seeing, all the troubleshooting attempts you’ve made, and any supporting media you have. If your pump is still under warranty, the manufacturer should repair or replace it at no cost, though you might cover shipping.
How Long Will It Take?
Processing times vary, so expect anywhere from a few days to weeks. In the meantime, ask about loaner pumps. Some companies or suppliers offer them to keep you going. If the claim is approved, you’ll receive instructions on returning the faulty unit. Be sure to pack it securely and follow all the guidelines they give for packaging to avoid any further damage to the pump.
When Does a Warranty Not Apply?
Warranties don’t cover problems that arise from misusing or accidentally damaging the pump. If you drop it, don’t clean it properly, or don’t replace the parts at the recommended intervals, your warranty will likely be voided.
Preventing Future Malfunctions
The best way to avoid issues is to maintain your pump properly. Clean it after each use, store it in a dry place, and follow the usage limits. Replace any wear parts on schedule, and register your pump upon receipt to fully activate the warranty.
If you’re pumping often or are totally dependent on your pump, consider getting an inexpensive backup manual pump just to have for emergencies. Also consider getting backup accessories so you can quickly get back to pumping if a faulty accessory is all it is.
When you order a breast pump, you almost always receive a manufacturer’s warranty, along with access to helpful support services that can resolve issues quickly and keep your pumping routine on track. The warranty information on breast pumps isn’t always intuitive to understand, however. Here’s a rundown of some of the more common concepts and what kind of support you can expect.
How to Understand Warranty Information & Services With Breast Pumps
General Information
Most breast pumps come with a warranty that protects you against manufacturing defects in the main components. The manufacturer will typically repair or replace the pump at no cost to you if the motor, wiring, or other essential parts fail, but only if they fail because of a factory issue. They won’t replace these things if they are damaged in everyday use or in an accident.
How long your pump is covered depends on the brand. The Unimom Opera includes a full three-year warranty on the pump itself, while Spectra models usually carry a two-year warranty on the motor with a shorter three-month warranty for accessories. Pumpables typically offers two years on the motor and ninety days on parts and cups. These terms will appear in the product descriptions when you buy and in more detail in the manual that ships with your pump.
Things That Aren’t Covered
Certain parts and certain situations aren’t covered under most standard warranties. Manufacturers typically classify flanges, valves, membranes, tubing, and collection bottles as consumable items, which means they’re expected to wear out naturally with regular use and cleaning. Since this is expected, it’s not covered: your coverage is only for defects. This means, for example, that if a valve splits or a membrane becomes stretched after weeks of daily pumping, you are expected to replace it yourself.
Accidental damage also falls outside the warranty. Dropping the pump, getting it excessively wet beyond what would be normal for cleaning, or using any non-approved accessories can all void the warranty entirely. The warranty is also voided if you use the pump in a way that’s not recommended, such as by running it without all parts assembled or with incompatible tubing. The best defense against having your warranty voided is reading the warranty section in your manual carefully so you understand all limits upfront.
Where You’ll Find the Terms
When your package arrives, open the box and look inside for the user manual or any separate warranty card. These documents will spell out the coverage period, what qualifies for coverage, what isn’t covered, and the steps you’ll have to go through if you need to file a claim. If you misplace your receipt, contact us at Breastpumps.com directly. Our team keeps records of every order and can email you a copy of your proof of purchase, which most manufacturers will require before they process anything.
You can also visit the manufacturer’s website and enter your pump’s model number or serial number to pull up the details of the warranty online. Saving the original box for the first several months is often wise because some brands ask for the serial number that’s printed on it.
Troubleshooting Issues With Your Pump
When your pump stops working correctly, think through and then take the following series of actions. These will help you identify the cause without putting any unnecessary stress on you, and if you have to call support, you’ll be able to walk them quickly through what you’ve already done.
Start by confirming that the power source is functioning properly and that the pump is fully charged (if it has a battery). If that’s all good, then inspect and replace any soft parts that are showing signs of wear, such as sticky valves or torn membranes. Sometimes this simple step restores normal suction immediately. If the problem continues, test some things by switching parts between the sides to see whether the issue follows a specific component.
Once you’ve done these steps, reach out to the manufacturer’s customer service line listed in your manual. Their representatives will usually then walk you through a few additional checks to check for some common issues they know of with their specific model, and often they can help you fix the issue or properly diagnose the trouble. If they confirm it sounds like there’s a warrantied defect, they’ll arrange for a repair or replacement.
At Breastpumps.com
We don’t issue the warranties, but our team plays a valuable supporting role for you. You can call them at 1-888-495-7491, use live chat on the website, or email referrals@breastpumps.com for help with your order. We can send you copies of receipts and direct you to the correct manufacturer contact. We can also answer questions about whether your insurance might help with replacement parts.
Also, many moms have original insurance benefits that include one or two sets of replacement parts during the first year. We can usually help you in accessing this coverage. You simply provide your insurance details, and we’ll check eligibility and handle much of the paperwork.
Avoiding Issues With Your Pump
Here’s a few simple, daily habits that’ll keep your pump running smoothly and protect your warranty:
Replace duckbill valves and membranes every one to three months or as soon as they start to feel sticky or lose their seal
Clean only the parts the manufacturer recommends for washing: never submerge electrical components
Store the pump in a dry, dust-free place when you finish each session
Always use genuine manufacturer-approved accessories (third-party substitutes can damage the motor and void coverage)
Filing Your Claim
If you do have issues and need to make a claim against your warranty, there’s a pretty predictable path you can follow. First, contact the manufacturer and describe the symptoms in detail, as covered above. Most will require that you go through this step before they’ll actually want you to return a pump. If that doesn’t fix it, they’ll typically ask you to provide the model number, serial number, and date of purchase. If they approve the claim, they’ll then supply you with specific return instructions and a shipping label, in most cases, though in some cases they may simply send you a replacement pump.
Whether you’re getting the pump fixed or replaced, you’ll eventually send the defective pump back, and they’ll ship the replacement or fixed pump back to you at no charge. The entire process rarely takes more than a week or two, though a lot depends on how fast the shipping happens. You can also always visit Breastpumps.com and talk to us about the process if you have questions or concerns.
Taking time to learn your pump’s warranty coverage and the support that’s available from the manufacturer (and available through us at Breastpumps.com!) takes away a lot of the uncertainty that can arise when equipment acts up. We know that new moms have enough on their plate, and we’re ready to help you move forward with as little stress and as few delays as possible. Reach out to us at Breastpumps.com any time you have a question. Our goal is to make the process of getting a pump and keeping it in good shape as simple as possible for Mom.
New mothers frequently are often looking for help, and thankfully, these days there’s lots of support available from various community resources. These groups, hotlines, and online hubs deliver practical ideas but also emotional encouragement and reliable information that’s tried and tested by other moms. Breastfeeding support is just a few clicks away!
What Are the Benefits of Joining a Breastfeeding Support Group?
All kinds of issues can throw themselves at you as a new mom. Your newborn may take time to latch properly, cluster feeds can exhaust you, or you might be wondering whether the baby is getting enough milk. Without someone to ask, it’s easy to doubt yourself and get consumed by worry, and that’s not the best thing for a new mom dealing with hormonal swings as a natural aftermath of childbirth. Mothers who connect with others early, though, can benefit from shared experiences and concerns. Here’s some ways community resources help:
You Stop Feeling So Alone
One of the biggest changes you notice early on is that the feeling of isolation starts to lift. In those first weeks, you’re often at home feeding around the clock while everyone else sleeps or goes about their day. It’s easy to think you’re the only one dealing with cluster feeding or a baby who fusses at the breast, but when you join an online group or read through shared stories on a dedicated site, you realize almost every mom hits these same bumps.
You might come across a post from another mom describing how she worried about her supply during a growth spurt and dozens of replies assuring her it passes in a few days. Or, you could see someone share about leaking through shirts or dealing with engorgement and think, “That’s me right now.” Reading those experiences makes you feel seen. You don’t have to explain why you’re exhausted or why a bad latch brought you to tears because everyone on the forum just gets it.
This connection can really help you push through tough days because you know you’re not failing. Many moms say that simply knowing others have been there keeps them from giving up sooner than they wanted.
You Pick Up Tips That Make Daily Life Easier
You don’t have to figure out every challenge through trial and error. Reliable community spaces are where moms share straightforward advice that comes from both experts and moms who’ve tried it all. For instance, you might learn a new way to hold your baby that helps with a shallow latch or find out about using warm compresses before feeding to ease your discomfort.
If you’re dealing with oversupply or forceful letdown, you can read suggestions for feeding positions that slow the flow so your baby doesn’t choke or pull off crying. Moms often share how they handle plugged ducts with gentle massage or lecithin supplements, for instance.
You can also get ideas for building a better routine. There are lots of moms on the forums, in lots of situations: some just like yours. They’ll have tips for how to watch for hunger cues early, keep a simple log of wet diapers and feed times to reassure yourself about intake, and other ideas that work for you.
You Can Get Professional Breastfeeding Support
Sometimes you need more than peer advice. You want guidance from someone trained in lactation. At Breastpumpscom, we not only have a supportive community of new moms but also access to certified lactation consultants. You can describe what’s happening and get specific feedback that’s responding to your specific needs and concerns. This kind of targeted help saves you from guessing or trying things that don’t fit your situation.
You might also find explanations about medications or health conditions that affect you and your baby. If you’re on antibiotics or have thyroid issues, for instance, a quick check with an expert might help you if you’re concerned about safety. For moms with premature babies or multiples, specialists can help you come up with plans that account for these unique needs.
You Learn How to Choose the Right Breast Pump for You
Pumping could become part of your routine for many reasons, like going back to work, sharing nighttime feeds with your partner, or building up a stash. But choosing pumps isn’t always easy. What works with your insurance but has the suction strength, battery life, size, or features you need? Other moms can help you understand what you need.
If you want something discreet for work or errands, you can ask others about the wearable pumps that fit inside your bra and learn which ones stay secure during movement or hold enough milk for longer sessions. Guides, of course, will explain how to assemble parts correctly, adjust settings for comfort, and avoid common mistakes that reduce output, but nothing is as helpful as actually talking to someone who has used a pump.
You Can Prepare for Going Back to Work Without Losing Your Supply
Returning to work while still nursing is doable, but it takes some prep. Through access to communities of breastfeeding moms, you’ll get realistic schedules from moms who’ve done it, and they’ll share how their output adjusted over time and what they did if it dipped at first. You might also get practical advice about storage, labeling, transport, and other highly practical issues.
You’ll Find Help for Your Unique Situations
Every family is different. If you’re nursing twins, talking with a wide community of moms means you’ll likely find someone else facing that same issue who can give you tips for tandem feeding positions or alternating feeds. Moms of preemies might find advice on fortifying milk or pumping schedules for NICU stays. If you’re inducing lactation, other moms may have some proven, step-by-step protocols to guide you through how they used herbs, pumping routines, or medications and the success they had (or didn’t have!).
Mental health doesn’t get ignored, either. Other moms know what you’re going through, and they can tell you what to watch out for. You’ll learn to notice signs of postpartum mood changes and get links to additional help. Plus, you’ll have someone right there to confirm that you’re not “going crazy.” Tough feelings are real, but they also often have an explanation and are something that lots of moms go thought. Knowing what’s happening and the options for help that other moms have found can be the support you need in the hard times.
You Build Confidence That Lasts Beyond Breastfeeding
As weeks turn into months, all this support and your own experience add up. You trust your body more, you feel confident with your child, and you’re ready to give advice to other, newer moms in turn.
This confidence also spills over into your other parenting decisions, and you might also find you’re better able to advocate for yourself at doctor visits or set boundaries with family. Many moms keep participating in these groups for the long term, answering questions for newcomers and paying forward the help they received.
Whether you’re just starting or hitting a rough spot, take a moment to explore a trusted online hub or hotline. Visit our Resources section at Breastpumps.com now and connect with a lactation specialist, watch helpful videos, and talk with other moms on our forums.
As a new mom, you’ve got a ton of decisions on your plate, and when it comes to breast pumps, there are many options. If you’re trying to decide between a portable vs table-top model, though, we can help you evaluate the general pros and cons and learn how to compare the two to see which is best for your lifestyle and needs.
Portable vs Table-Top Breast Pumps
Defining Our Terms
Portable breast pumps are usually of lightweight construction (often weighing less than a pound) and have rechargeable batteries so you can have easy, cordless operation. Many models fit discreetly inside a bra so you can do hands-free pumping as needed even while commuting or doing household chores.
With these models, flanges are typically compact, and milk collection cups are smaller and designed to slip easily into and under clothing. Some advanced versions will connect to smartphone apps for tracking your sessions, adjusting suction levels, and monitoring battery life. They typically also come with an array of travel-friendly accessories, such as carrying cases that meet airport security standards. Finally, most prioritize quiet in the motors so you can have a bit more privacy in a public setting.
Table-top breast pumps, which might also be called “stationary,” are about having a strong, efficient pump. These units plug directly into electrical outlets, so they deliver consistent power. You’ll often see models with dual expression capabilities so you can pump from both breasts to save time, and they come with larger collection bottles and typically a lot more choices for flanges and settings. Many modern versions will include digital displays so you can control speed, suction, and memory functions.
General Pros and Cons
Portability is in itself obviously the biggest benefit of a portable model, but it has to come with some trade-offs. Battery life on the portable models will typically last for several sessions, but they do require regular charging, and if you forget, you’re out of luck. Also, the battery power means suction strength is limited. So while these are effective for many, they might not work for all and can’t match the intensity you get in larger, table-top models.
The stationary nature of a table-top model isn’t ideal if you don’t have a pretty predictable routine, but the efficiency and reliability are unmatched. If you need to do a prolonged session, you get uninterrupted power for as long as you need. Drawbacks, however, will include the weight and bulk of these models and the requirement to be near a power outlet to use one.
Making Your Choice
Mobility Needs and Daily Activities
Mothers with active lifestyles, such as those who commute by public transport or frequently have to run errands, will benefit immensely from portable options. These pumps allow for multitasking and make it possible to express milk while you’re preparing meals or attending virtual meetings. Table-top models, however, excel in environments where time isn’t an issue. A stay-at-home parent might prefer the stability of having a designated pumping station in a nursery with no need to worry about the hassle of recharging a device.
For women balancing work or school with motherhood or for busy athletes or outdoor enthusiasts, the portability of smaller models allows you to do discreet pumping sessions in break rooms, whereas table-top units require planning, outlets, and more privacy. Those with newborns who spend most of their time at home are more likely to appreciate that table-top models tend to come with more flange choices and can generally pump more efficiently.
Power Sources and Reliability
Portable pumps rely on built-in batteries, and while this offers you freedom from cords, you have to be vigilant in your charging habits. A full charge might get you as many as six to eight sessions, depending on the model, and some do have USB compatibility with power banks in case you forget or don’t have time for a full recharge.
Table-top pumps draw power from wall outlets, so that does ensure steady suction without interruption from any low battery warnings. It also means you’re tied to a certain place. However, the reliability of a plug-in model might be just what you need for a groggy nighttime pumping session or if you find your milk supply needs stronger stimulation. Some of these models do come with adaptors that allow you to use them in the car, making them slightly more versatile, but they’re still not truly portable.
Size and Weight
Size and weight directly impact how well a pump is going to fit into your daily life. Portable models obviously are more compact and easy to slip into bags without adding a lot of bulk. They’re also great if you’re trying to deal with an infant and toddler at the same time and don’t want any more weight to carry than you absolutely need.
Table-top pumps are, of course, larger by design. This means they will typically require a dedicated storage space and are cumbersome for travel. They can be a real challenge if you have limited luggage space, too. However, bear in mind that their size and weight are often due to their having more robust components and larger motors, so you get stronger suction and more efficient pumping.
Noise Levels and Discretion
Noise is often a key concern for a pumping mother, and typically portable pumps are made with a focus on quiet operation. Motors are engineered specifically to produce as little sound as possible, which makes them great for pumping in any place where you don’t want to draw attention.
Table-top models vary in volume, and some definitely have a rhythmic hum that’s loud enough it might disturb light sleepers or your work colleagues. While advancements in tech over the years have reduced the noise levels in newer versions, they are generally still pretty loud compared to portables. Discretion isn’t just about noise, though. It’s also about design. Portables can be concealed under clothing, but if you’re using a table-top model you’ll likely want either a privacy cover or to use it in a secluded area.
Pumping Efficiency and Milk Output
So far, the portables have been shining in our comparison, but when we talk about efficiency and milk output, the table-top models really come into their own. Portable pumps offer respectable suction and typically come these days with multiple modes to mimic the letdown and expression phases. However, their smaller motors often mean you actually need longer sessions to completely empty.
Table-top models give you rapid, thorough extraction, so you’re minimizing the time you spend pumping. Their dual-phase technology closely replicates the feel of natural nursing, and most women find this promotes better let-down reflexes and higher yields. If you’re only pumping, the efficiency will likely be invaluable to you in maintaining an ample supply.
Cost and Long-Term Value
Portable pumps usually come at higher prices due to their more advanced technology. Essentially, look to find them in the mid- to premium tier of pumps. There are usually more table-top models available at affordable entry points, and the accessories for table-top models are usually also a bit more budget-friendly.
Which model is right for your lifestyle? To look through options, contact us now at Breastpumps.com. We can help you find a model that fits your lifestyle and is covered by your insurance.
Welcoming a new baby means countless moments of joy, but it also introduces a learning curve that no one fully anticipates until they are in the thick of it. For nursing mothers who pump, breast pump care can be tricky, and keeping breast pump parts clean and truly sanitized is one of the most important of your new daily responsibilities. Milk residue that gets left too long on the parts will become the perfect breeding ground for bacteria, mold, and a biofilm that no amount of casual cleaning can sufficiently remove. The good news is that safe, thorough cleaning and sanitizing require only a few minutes once you understand the right steps and the reasons behind them.
Breast Pump Care: Cleaning and Sanitizing Safely
Why Cleaning and Sanitizing Are Two Separate Steps
Many mothers use the terms “cleaning” and “sanitizing” interchangeably, but these are actually two functions that accomplish two different goals. Cleaning removes the visible milk fats, proteins, and other residue from the surfaces of flanges, valves, membranes, bottles, and tubing. Warm water and a mild dish soap designed for baby items can handle this task beautifully.
Sanitizing, however, takes the process further by killing the microscopic organisms that cleaning alone leaves behind and which aren’t visible to the naked eye. The Centers for Disease Control and Prevention recommends both steps for any item that touches breast milk in any way, and especially if your baby is still under three months, was born prematurely, or has a compromised immune system. But the reality is that even healthy, full-term infants can still benefit from this extra precaution because their digestive and immune systems will continue developing well into the first year.
Gather the Right Tools
To thoroughly clean and sanitize your breast pump parts properly, here’s some of what you’ll need:
A dedicated washbasin that you use only for pump parts and baby bottles (remember that using the kitchen sink could introduce cross-contamination).
A fragrance-free, dye-free dish soap labeled safe for infants; many popular brands offer versions specifically for breast pump parts and bottles.
A small bottle brush with soft bristles that can get inside narrow tubing connectors.
A separate nipple-and-valve brush.
Soft microfiber cloths or paper towels reserved solely for drying pump parts (this prevents cross-contamination by lint and stray germs from using ordinary kitchen towels).
Cleaning After Every Pumping Session
The moment you finish pumping, take thirty seconds to rinse each part under cool running water. Using cool water prevents milk proteins from “cooking” onto the plastic the way hot water sometimes does. Next, disassemble everything completely. Remove the membranes from the valves, separate the backflow protectors, and detach all tubing from both the pump and the flanges.
Fill your dedicated basin with hot, soapy water and submerge all the components. Scrub them gently but thoroughly with the bottle brushes, paying special attention to the underside of valves and the inside of duckbill or membrane covers. Finally, rinse everything again, this time under warm running water, until no soap residue remains, and then place the pieces on a clean towel or a drying rack designed specifically for baby items. If you have the time, air drying beats towel drying because even freshly laundered towels can harbor bacteria.
When and How Often to Sanitize
Sanitizing daily is really the gold standard if you have a newborn or a medically fragile infant, but once your baby reaches three months and is in good health, you can do it less often so long as you clean thoroughly after each use. Many experienced mothers end up sanitizing in the evening after the final pump of the day, so they can store their replacements parts in the morning.
There are four reliable methods for achieving true sanitation: boiling, steaming, using steam sanitizers designed for countertops, or using your dishwasher. Each works well when you follow the instructions precisely.
The Boiling Method
Bring a large pot of water to a rolling boil. Carefully lower the disassembled pieces into the water using tongs, and set a timer for one full minute from the moment the water returns to a boil. When the timer goes off, turn off the heat and let the parts remain in the hot water for another minute or two before removing them with clean tongs. Place them on a fresh, clean towel to air dry.
Microwave Steam Bags
Steam bags are very convenient and also effective. Fill the bag with the recommended amount of water, which is usually two ounces or so, and then add the clean, disassembled parts. Seal the bag securely and then microwave it according to the package directions. This will usually take from three to eight minutes, depending on the wattage of your microwave.
Allow the bag to stand for the suggested cooling time before you open it, and then empty the parts onto a clean drying rack and let them air dry. Each reusable bag can go for twenty or more cycles, so this is an economical and portable way to sanitize, especially if you have to pump at work. Just be sure to allow bags to completely air dry between uses.
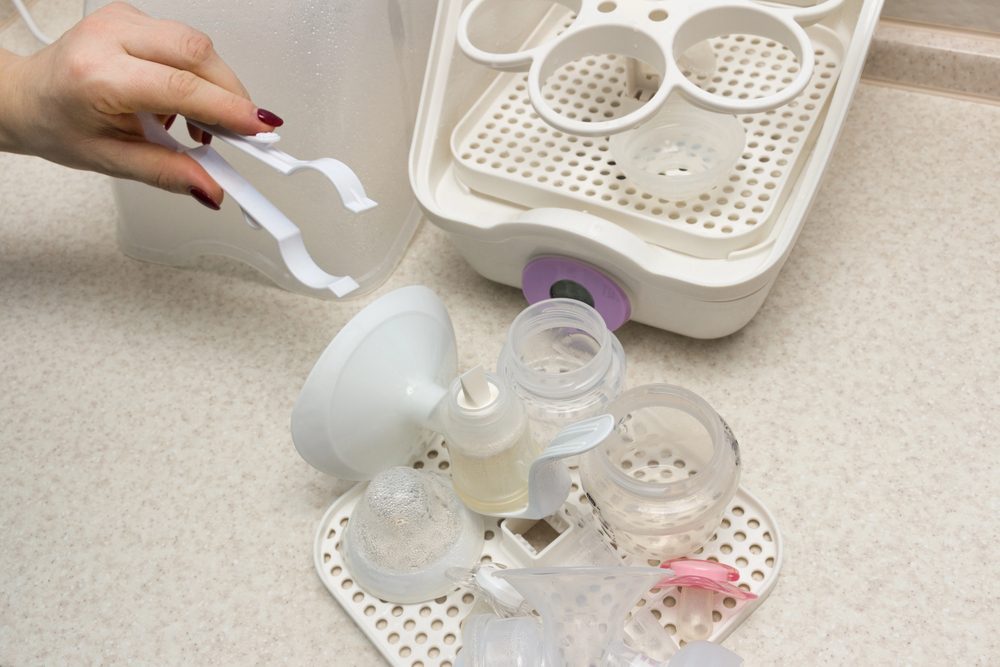
Electric Steam Sanitizers
Countertop electric steamers that are specifically designed for bottles and pump parts are now available, and they’ve definitely gotten more popular with moms over the last few years. All you have to do is load the clean parts onto the racks exactly as the manufacturer specifies, add the correct amount of water to the base, and press the button. Most units finish in six to twelve minutes and keep the items sterile until you open the lid.
The Dishwasher
The CDC recommends using your dishwasher to clean and sanitize at the same time. This works only if you use the hot water wash and heated dry settings (or sanitizing setting). Using the dishwasher seems so simple you might wonder why anyone would use anything else, but the breast pump parts can take up a lot of space, and running both a hot water wash and a heated dry cycle can take more time.
If you have other kids and lots of dishes that need to be done, the dishwasher may not be the most feasible application, and an electric steam sanitizer or a microwave bag could be much more efficient.
Special Considerations for Tubing
Liquid inside the tubes can promote mold growth that will spread to every bottle of milk you pump, so the tubing has to be dealt with carefully. If you notice no milk or condensation inside the tubing after a session, then simply hang it to air dry, but when milk does enter the tubing or you notice any condensation, wash it immediately.
Run warm, soapy water through each tube, then rinse them thoroughly with clean water. Hold one end up high and let gravity drain the tube completely or use a pipe cleaner made for pump tubing. Then, run 70% isopropyl alcohol through the tubing to sanitize it before thoroughly rinsing it with water and hanging to dry. Tubing doesn’t do well being boiled, steamed, or put in the dishwasher, so the alcohol is the fastest, safest way to ensure sterility.
Breastfeeding journeys are as individual as the mothers who live them. One woman will have a seamless latch right away and overflowing supply, while another battles discomfort that makes every pumping session feel like an ordeal. Add a swirl of hormones to all that you’re dealing with, and things can get…complicated. One of the last things you may feel like doing is fighting with the flange sizing on your breast pumps, but it’s a crucial part of the journey. If you choose the wrong size, it might cause pain or prevent you from yielding the supply you need. With the proper size, you’ll feel encouraged, and your pumping experience will be more comfortable and productive.
The Importance of Correct Flange Sizing
Flanges might not seem important, but they make a big difference to your pumping outcome. The flange needs to embrace your nipple closely without squeezing the areola or allowing too much empty room. When it succeeds in this, the suction distributes uniformly and properly rouses your milk ducts. You’ll also typically get more thorough drainage in less time with minimal nipple injury, which lowers your chances of developing mastitis or fissures.
A poor fit triggers a chain of issues. If the flange runs small, it pinches your tissues and causes pain. If it runs large, the nipple can scrape the tunnel interior and invite irritation, swelling, and ineffective suction. Eventually all these difficulties can lead to you production falling short. You may even stop nursing sooner than intended. After all, discomfort is a primary cause of premature breastfeeding termination.
At BreastPumps.com, we offer flanges in a wide variety of sizes because uniformity serves no one.
How Nipple Structure Shapes Your Flange Requirements
Each breast stands apart, unique in its size and shape based on your heredity, hormones, and life phase. Nipple width can actually differ broadly. Some might register eighteen millimeters before suction, while others reach twenty-four millimeters or beyond, and elasticity factors in as well. Under suction, your nipple swells a bit and should occupy eighty to ninety percent of the tunnel without brushing the walls. The areola, the colored zone encircling the nipple, needs to stay largely beyond the flange.
Elements like early-week fullness or body weight changes can also cause a change in fit as the months pass. Prolactin floods after birth frequently cause a brief enlargement that calls for a bigger size at the start, and once your supply steadies, you may need something smaller. Stretchy nipples will tend to elongate more beneath the pull and require a flange that permits motion without allowing for abrasion. Stiffer nipples will need very exact proportions to stop tugging.
Gauging Your Nipple to Find the Best Flange Size for Your Breast Pumps
To get the most accurate measurements, wait until your breasts are not excessively swollen. It’s often best to gauge around mid-morning following nursing or pumping, when the tissue is supple. Find a ruler marked in millimeters or download a guide, and then start by hand-expressing a drop or two of milk or using your pump to mimic suction states. Position yourself before a mirror for the most accurate readings.
Set the ruler at the base of your nipple where it meets the areola. Measure the width of just the nipple itself from edge to edge—don’t count any areola tissue that sticks out. Mark down results for each breast, since differences are likely, and then base your choice on the larger nipple. Be sure to increase your figure by one to two millimeters to allow for swelling.
If you’re caught between options, lean larger so you don’t have issues with constriction. You can evaluate the fit during your next full pumping cycle. During this evaluation, your nipple must sit centered in the tunnel and glide smoothly with each pulse. Only a little areola should enter the tunnel. Once you’ve selected your size, check again every few weeks, particularly if your yield slips or soreness appears.
Signs of Improper Flange Fit
Your body will send clear signals about flange mismatches if you pay attention, and pain is the most important warning. If you feel sharp pain while you’re pumping or a dull ache and tenderness later that won’t go away, you probably have the wrong size flange. Visual clues to look for include seeing red circles on your areola, puffy nipples, or milk that’s stuck in the tunnel because you’ve only partially voided.
Another sign there’s an issue is if your productivity suffers. If you notice that your pumping sessions aren’t returning the same amount even though you’re getting good letdown, or if they last beyond 15 or 20 minutes for both sides, then there’s a good chance you’ve got a sizing error. Sound can also be an indicator. If air is escaping, you might hear a whistling sound. You might also get an erratic pull. And obviously, if you’re seeing any blood, even if it’s just a little, adjust your flange size to avoid further injury. If you’re still having trouble, connect with one of our lactation specialists at Breastpumps.com for expert guidance.
Adapting Flange Size Across Nursing Phases
One of the things new moms might not be aware of is that your demands, especially your flange size, are likely to evolve across nursing phases. During your initial pumping sessions, you may need a really gentle option, but when your volume starts to peak, you may need to enlarge your flange size so that you can keep pumping without pain.
There are sleek flanges available that you can use once you go back to work so you can pump more subtly. Be aware, too, that if you’re pumping right after you’ve been briskly active or are very warm, your breast may have swelled slightly. Monthly hormone changes can also make a difference, but if you keep a log, you’ll be able to anticipate these. Always carry extras in different sizes and keep them in your tote bag so you have options.
Knowing When to Consult Specialists
There’s no shame in getting help, so if you’re having trouble after a couple of tries, it’s time to talk to a lactation specialist. Additionally, nipples that are overly stretchy or particularly stiff and narrow may need some tweaks beyond just a different flange size. A professional can help you make this assessment, as well as rule out if anything could be wrong with the pump or suction force.
Contact us today at Breastpumps.com to see which insurance-covered breastpumps you qualify for, and get the support you need to take charge of your breastfeeding story.
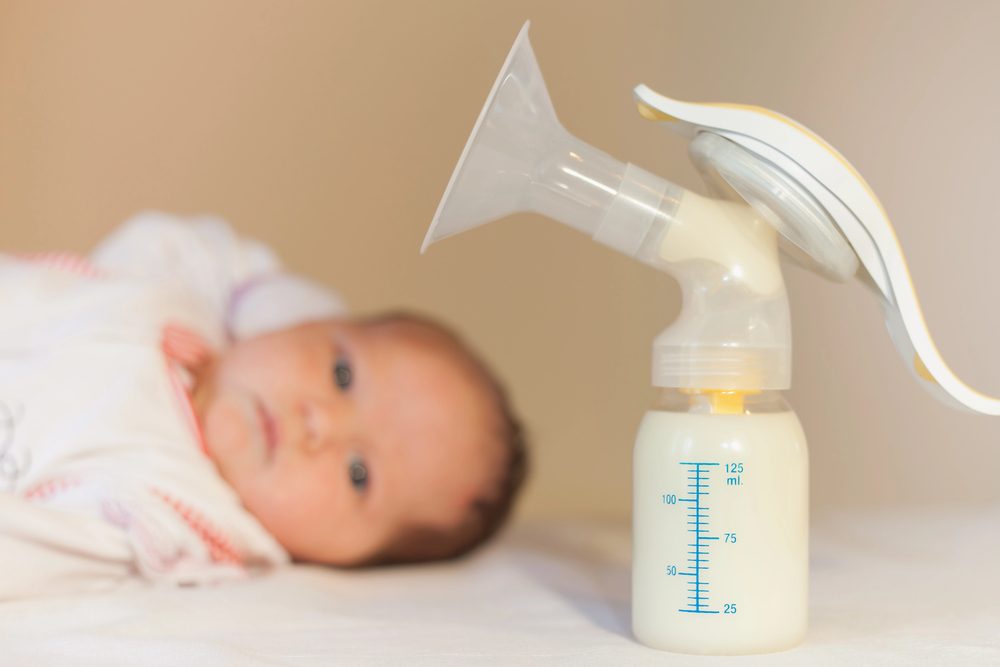
Motherhood has a way of changing things overnight. Before the baby, you’re just mapping out a leisurely coffee run. After the baby, you’re juggling a breast pump, a cooler of milk, and a diaper bag that feels like it’s holding the weight of the world. If you’ve ever found yourself in the back seat, fumbling through a tangle of pump parts while your little one dozes in the car seat, you’re not alone. Breastfeeding on the go is tough, and at the heart of mastering it are the right travel bags. These breast pump accessories are your holy grail of mobile pumping.
Why Travel Bags and Totes Are a Game-Changer for Breastfeeding Moms
Life doesn’t pause for milk production. The American Academy of Pediatrics recommends exclusive breastfeeding for the first six months, and many moms extend that well into toddlerhood, but when you’ve also got to return to work, travel for family visits, or even just hit the playground, you need to be able to pump to keep your supply up. Without the right setup, the logistics are overwhelming.
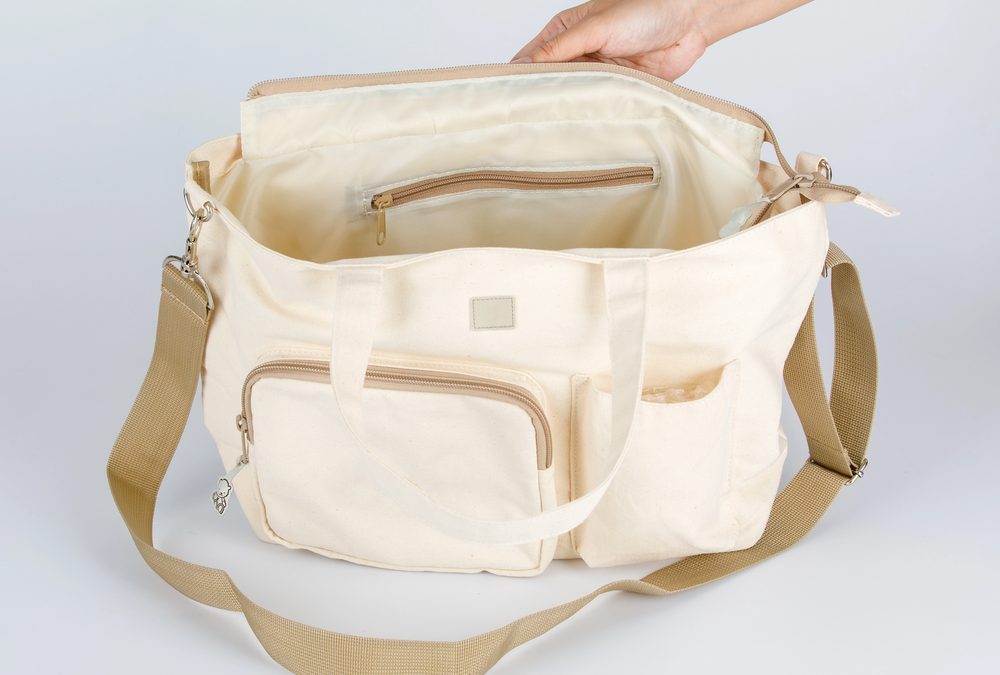
Pumping bags and totes are the breast pump accessories you need. They’re insulated, compartmentalized, and tough enough to handle spills, bumps, and the occasional toddler tantrum. A good one can hold your breast pump, flanges in multiple sizes, storage bottles, a portable cooler, cleaning supplies, and even a nursing cover. This efficiency comes from a smart design that includes quick-access pockets for tubing and Velcro straps to keep your pump steady during those bumpy commutes.
At BreastPumps.com, we stock a range of options because we know that choosing one of these isn’t about fashion (though, let’s be real, who doesn’t want to feel put-together?). It’s more about finding a bag that will actually support your breastfeeding journey. Invest in quality, and you’ll save hours of frustration, and even money from protecting your parts from damage.
Step 1: Selecting the Perfect Pumping Bag or Tote for Your Lifestyle
Not all pumping bags are created equal. Start by assessing your routine. Are you a desk-bound professional who needs something that slips under your office chair? Or are you a frequent flyer who needs TSA-friendly dimensions? Once you’ve thought through where and when you’ll be using it most, consider the following:
Capacity and Compartments
Your pumping bag needs to be able to multitask without all your stuff being jumbled up. Look for at least three main compartments. You’ll need one insulated for milk storage (to keep it fresh for up to 12 hours), a padded section for your breast pump, and exterior pockets for quick-grab items, like wet bags or sanitizing wipes. Measure your breast pump first, because a wearable one like the Willow Go will fit in slimmer totes, but larger models like the Unimom Opera demand more space.
Portability and Comfort
On the go should also mean hands-free when possible. Backpack-style totes are great because they distribute weight evenly and will spare your shoulders during long walks. Adjustable straps and chest clips are must-haves for moms carrying a baby carrier, too. For car commutes or airports, you might prefer totes with luggage handles that can slide over suitcase grips.
Budget and Eco-Friendly Picks
Quality doesn’t have to break the bank, and there are some entry-level totes that start at $20. But investing more like $50–$100 in a feature-packed one could pay off and save you your sanity. For eco-conscious moms, look for reusable ice pack options and BPA-free accessories.
Ultimately, though, remember that the best bag is the one you’ll actually use daily.
Step 2: Packing Your Travel Bags With Breast Pump Accessories and More
Packing is an art form that saves time and stress. When your tote is packed well, every item has a place and nothing rattles around like loose change in a dryer. Aim to prep everything the night before so mornings can be just grab-and-go.
What to Pack Every Time
Follow this checklist to avoid forgetting a crucial piece behind, especially for extended travel:
Breast Pump and Power Source: Your double electric pump, plus a car adapter or portable battery. Put it in the main compartment and secure it with elastic loops.
Pump Parts and Flanges: Bring extra flanges, membranes, valves, and tubing. Use a dedicated accessory pouch so you don’t end up with any cross-contamination.
Milk Storage: Pack at least four to six bottles or bags. Pair it with a six to eight-hour cooler insert and frozen ice packs. Pre-label bags with the dates you intend to pump using a Sharpie.
Cleaning Kit: Microwave sterilizer bags, brush sets, and unscented wipes are great. A small bottle of baby-safe soap is smart, too.
On-the-Go Extras: Nursing pads, a hands-free bra, nipple balm, and a snack bar are always useful to have on hand!
Aim for under 10 pounds to keep it tote-able, and use packing cubes or divided inserts to create “zones.” Zones might include clean parts, dirty, milk, cleaning supplies, etc.
Organization Hacks
Try color-coding the compartments. A good way to go can be blue for clean, red for used, green for milk, and purple for supplies.
Roll the flanges and tubing to save some space, and put them in a small Ziploc bag to keep them free from debris.
Download apps like Pump Log so you can track your sessions easily and sync with smart pumps. That’s one less thing you have to keep track of in your mind.
For longer outings, scale up by adding a foldable pumping cape for privacy and a power bank for all-day juice.
Step 4: Troubleshooting Tote Troubles and Pro Tips
Even the best setups can hit snags, and your setup isn’t efficient if it falls apart once you get into the real world. Here’s a few pro tips:
Is milk leaking into other pockets? Then try doubling up your storage bags or add a small dry-bag insert.
Do you feel like your bag is always overpacked and too heavy? Conduct a weekly audit. Throw away any expired products or old wrappers, and consolidate any duplicate things you’ve been carrying around that you don’t need for everyday use.
Bonus: Follow our BreastPumps.com social media accounts for mom hacks from us and other moms like you who are pumping on the go!
Pump On, Mom
Don’t worry. You don’t have to get it all perfect the first time. The important thing is to stay persistent, invest the time to discover the right tools, and then play around with them to make them work into your schedule and needs. When you have a well-packed tote, it helps turn chaos into confidence. There is no better peace of mind than knowing you’re able to nourish your baby no matter what the day brings you.
As a nursing mom, you already juggle enough, so pumping shouldn’t add to the stress. With a setup that fits seamlessly into your daily rhythm, you can make each session feel effortless. One smart way to facilitate that is creating a storage-organization system for your breast pump accessories and replacement parts, so everything is exactly where you need it.
Why Proper Storage Transforms Your Daily Routine
Make Life Easier
Free time is scarce for new moms, so when you finally have a moment to pump, it’s much easier to strike while the iron is hot if you know exactly where all your pieces are. There’s no mad scramble through drawers or the pang of discovering a forgotten valve tucked in a bag from weeks ago.
Enhance Safety
Properly storing your breast pump parts after a session or a cleaning can help improve the longevity of your components. Damp parts left in a sink invite bacterial growth, while tangled tubing can crack and disrupt suction. Following sound storage practices can prevent potential damage and save you money in the long run.
Clear Your Mind
A well-organized setup provides mental clarity. There’s nothing worse than being sleep deprived after a night of late feedings, and you open your cabinet door to breast pump parts tumbling out of it. Organizing the chaos will help you keep a clear mind when you’re running on empty and tending to your little one.
1. Selecting Containers That Fit Your Space
Start by choosing transparent, compact containers so you can see what you need at a glance and grab it easily. Clear bins with secure lids keep everything visible while protecting your parts from dust. For safety, opt for BPA-free plastic or food-grade silicone organizers. Stackable containers and tray dividers can also help you stay organized while maximizing your space.
2. Organizing Breast Pump Accessories and Replacement Parts
The placement of your parts should be arranged based on how frequently you use them. Place your everyday-use items front and center. That way, you can grab them without fumbling through a sea of different pump pieces and assemble them even with your eyes half-closed.
For the pieces you swap less often, like backup flanges or extra tubing, carve out a secondary zone that’s out of the way but easy to access during those inevitable “oh no” moments.
Layer in seasonality if your climate or routine is likely to shift. In humid summers, you might elevate the moisture-prone items to a drier spot, while in winter you might need insulated pouches to keep the cold from stiffening up any silicone components.
3. Labeling and Tracking for Easy Navigation
A simple marker and tape are all you need to level up your storage system. Label parts with dates if they tend to have a shorter shelf life, like the date of installation for valves or the suggested replacement date for tubing, so you can track things without all the guesswork. Once you’ve written all these things down, you don’t have to keep space in your brain for remembering it all.
Extend this practice to keeping a quick log, which can be a notebook by your pump or an app on your phone, where you jot notes about replacements and needs. “New membrane boosted output—keep this brand,” for instance. This will also build your knowledge base so you can tweak your setup for optimal output.
Embrace color-coding if visuals are your thing. Try blue for daily use and red for backups so you can just do a quick scan and grab what you need. This also comes in handy when a babysitter or house cleaner stops by, making it easy for them to learn your system and find their way around the kitchen. Over time, refine the system and discard what no longer serves.
4. Keeping Cleanliness at the Heart of Your Storage
After each use, clean and air-dry everything thoroughly before nestling things away. Keep a dedicated rack that lets the breeze work its magic. Your storage spot will thus stay dry and mold-free.
Incorporate routine soaks with a vinegar solution for an extra barrier against buildup, and then rinse and dry the pieces thoroughly before storing them away. For spares, consider vacuum-sealing them to lock out air and microbes so you can have confidence that they’re ready to go without needing to clean them again before use.
5. Choosing Portable Solutions for On-the-Go Pumping
If you’re traveling or out-and-about and need your pump to tag along, you want to ensure all the parts are easy to access. Ideally, you need a setup where you can simply grab-and-go whenever you want to leave the house.
Insulated totes with padded dividers are the perfect solution. They cushion valves during transport while keeping temperatures in the safe-zone for milk storage. Zip in a travel kit of essentials that is clearly labeled for airport scans or quick bag changes. While it might seem like a lot of prep work, it lets you nurse on your terms without tethering you to home.
When everything you need for your pumping is organized and clear, it helps you reach and sustain your pumping goals. For help in finding the right pumps and accessories for your journey, visit us today at Breastpumps.com.
To provide the best experiences, we use technologies like cookies to store and/or access device information. Consenting to these technologies will allow us to process data such as browsing behavior or unique IDs on this site. Not consenting or withdrawing consent, may adversely affect certain features and functions.
Functional
Always active
The technical storage or access is strictly necessary for the legitimate purpose of enabling the use of a specific service explicitly requested by the subscriber or user, or for the sole purpose of carrying out the transmission of a communication over an electronic communications network.
Preferences
The technical storage or access is necessary for the legitimate purpose of storing preferences that are not requested by the subscriber or user.
Statistics
The technical storage or access that is used exclusively for statistical purposes.The technical storage or access that is used exclusively for anonymous statistical purposes. Without a subpoena, voluntary compliance on the part of your Internet Service Provider, or additional records from a third party, information stored or retrieved for this purpose alone cannot usually be used to identify you.
Marketing
The technical storage or access is required to create user profiles to send advertising, or to track the user on a website or across several websites for similar marketing purposes.


